 Skip to main content
In today's guide, we'll dive into the somewhat intricate process of replacing the Imaging Units in a Xerox C315 printer. Follow these step-by-step instructions to navigate through the process seamlessly.
See our review of the Xerox C315 Printer
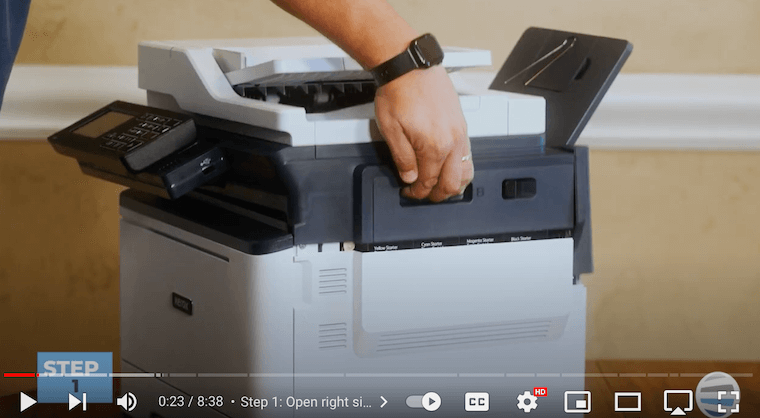
Step 1: Access the Imaging Units
To begin the replacement process, lift the right-side cover of the printer until it clicks. Then, open the front cover by grabbing both sides and lowering it.
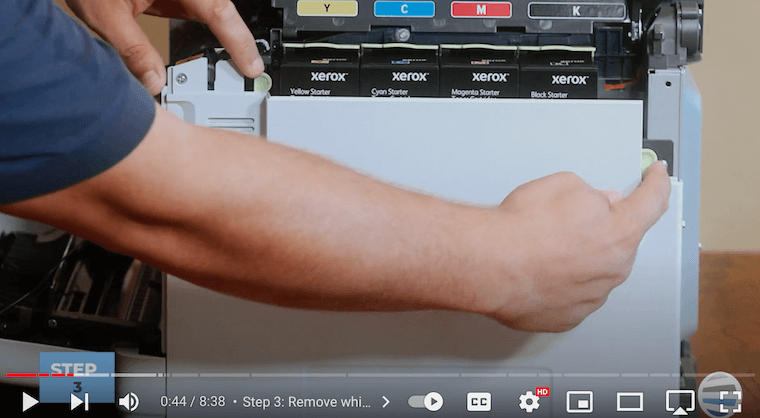
Step 2: Remove Side Cover
Remove the white side cover (with the letter ‘A’) by pushing the two green buttons towards the machine, this will pop open the cover. Grab the cover and pull it out.
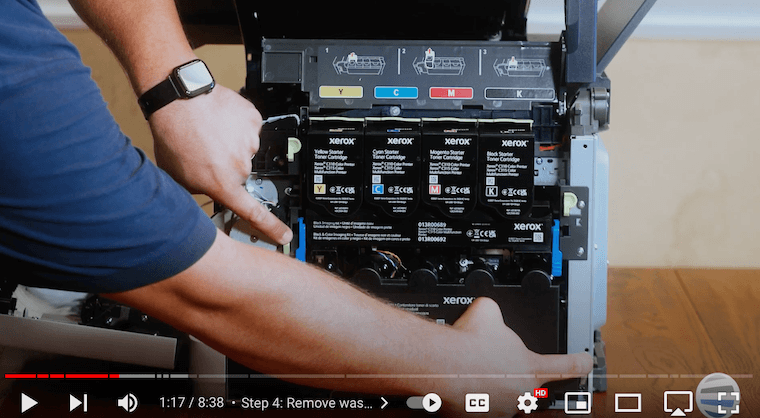
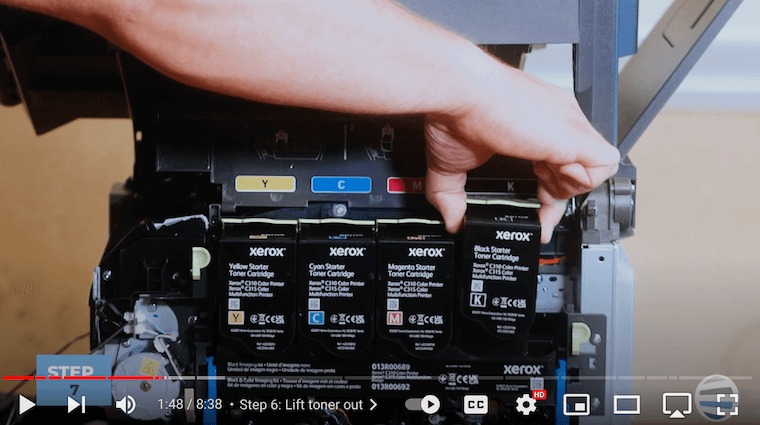
Step 3: Remove the Waste Toner Bottle and Toners
First, you need to remove the waste toner bottle at the bottom by pushing the green tabs inward. Catch the toner bottle with your other hand to prevent spills. Optionally, remove all four toners by lifting the green button and pulling the toner cartridges straight up.
Step 4: Access the Imaging Unit Tray
Now that the toners are out of the way, we can identify the Imaging unit tray located between the two previously removed items. To access the imaging unit, lift the two blue handles on the sides until they are horizontally flat. Pull the handles straight out until the imaging kit stops halfway. Don’t force the tray beyond this point.
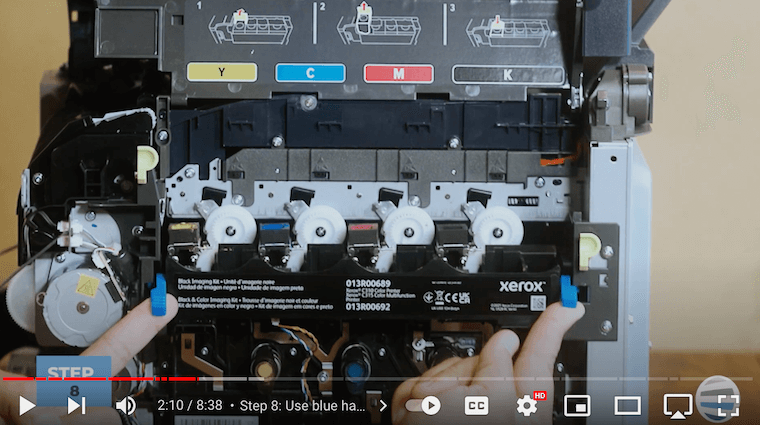

Step 5: Remove Imaging Kit
To fully remove the tray, use the green handles on the sides and press the blue button on the right side with your thumb. Slide the imaging kit tray out.
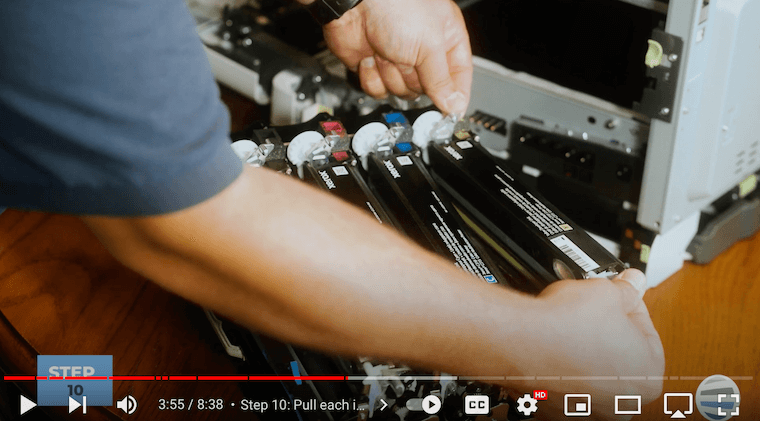
Step 6: Remove the Color Developer Units
On top of the Imaging kit tray, locate the color developer units. To switch these out, grab onto the cast metal handles on each end of the unit you want to replace. Lift the unit on the end with the black gear first, then pull it out. Set it aside carefully with the color facing up. Be cautious as the toner can be messy.
Pro Tip: Printer toner can be vacuumed if you keep it dry.
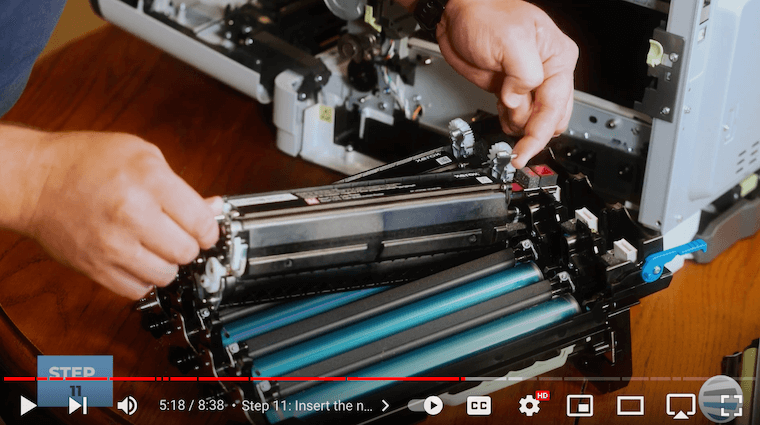
Step 7: Reassemble the Imaging Unit Tray
Insert the new developer units in the correct color order indicated on the side of the machine. Lift the developer unit by the cast metal handles with the white gear facing the toners and carefully insert it back into place by angling it in and seating it in place. Make sure not to scratch the drum as you insert the units.
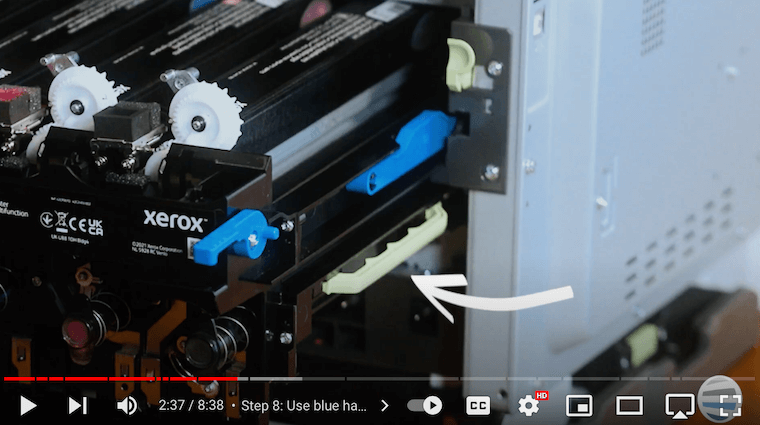
Step 8: Insert the Imaging Unit Assembly Back in
Once all developer units are in place, grab the green handles on the side of the imaging kit tray to lift it. Slide the tray back into the machine by setting its bottom hooks in place and push it in until it clicks. Once you hear a click, you can push the whole assembly in. Finally, lower the two blue latches to secure the tray in place.
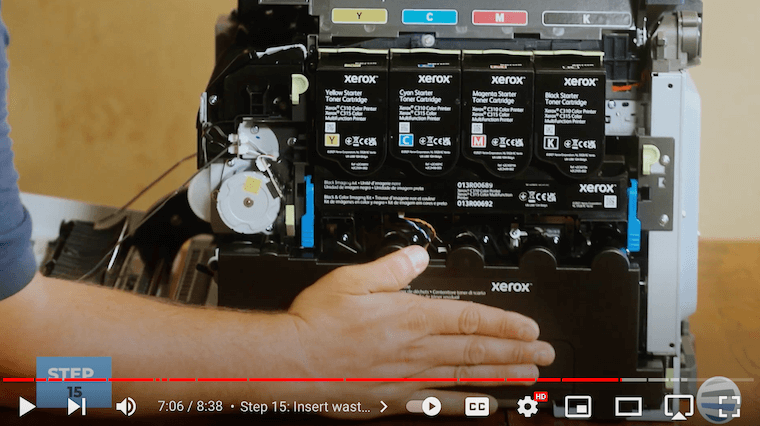
Step 9: Reinstall Toners and Waste Toner Bottle
Place the toner cartridges back into their slots, ensuring they sit securely. Push the toners down until you hear a click. Insert the waste toner bottle with the holes inside facing up and align them with the shoots coming out of the drums. Press the bottle firmly until it's flush with the side.
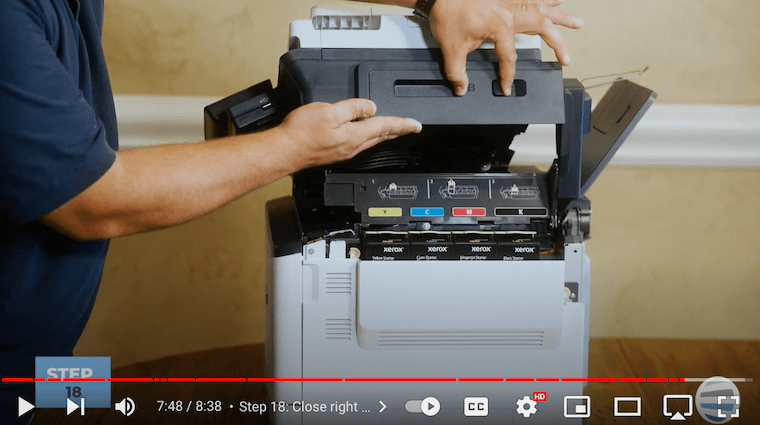
Step 10: Close the Front & Side Covers
Reattach the white side cover by aligning the hooks on the bottom and swinging it up until it clicks. Now, close the front cover by swinging it up until it clicks.
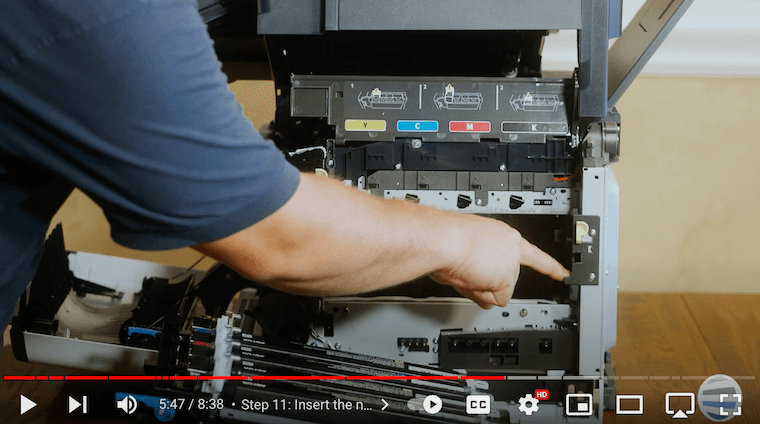
Step 11: Close the Top
Lastly, lower the top cover by squeezing the black button located on the top, next to the letter 'B. Be cautious, as the top cover can be heavy. To avoid a sudden drop, exert upward pressure with one hand, squeeze the latch, and gently guide it down until it snaps into place. This careful maneuver prevents any mishaps and ensures a secure closure.
Learn about the benefits of investing in a maintenance plan for your multifunction printer.
Take Control of Your Printer Maintenance
Congratulations on navigating the intricacies of Xerox C315 Imaging Kit Replacement! We understand the challenges you face when it comes to printer maintenance, and this step-by-step guide will give you the skills to tackle it head-on.
Your printer is more than just a machine; it's a reliable companion in your daily tasks. Ensuring its longevity and optimal performance is not just a technical necessity but a way of expressing care for your business and workforce.
We've all been there – the dread of a printer malfunction disrupting our workflow. With this guide, you're not just learning a process; you're gaining control over a potential source of stress.
A smoothly running printer means less downtime, fewer headaches, and a more peaceful work environment. It's about reclaiming control over an essential tool in your professional or personal space.
Looking for More Tips?
As you embark on this journey of printer maintenance, remember that you're not alone. The Printing Workshop YouTube channel community is here to support you. If you found this guide helpful, subscribe for more than just tutorials – join a community that understands the frustrations and joys of printing. Your printer deserves the best, and so do you. Happy printing!
If your printer issue can’t be quickly fixed, contact us and a trained printer technician will happily help you.
