 Skip to main content
If your Xerox AltaLink B8200 Series copier is displaying a "Replace Transfer Belt Cleaner" message, you may be wondering what this component does and whether replacing it is something you can handle yourself. Fortunately, the process is relatively straightforward when you know where to find the part and how to install it correctly.
Like many maintenance items inside a Xerox copier, the transfer belt cleaner plays an important role in maintaining print quality and keeping the machine operating efficiently. Ignoring a replacement alert can eventually affect performance, which is why it's best to replace the component when prompted.
At Strategic Technology Partners of Texas (STPT), we've serviced thousands of Xerox printers and copiers across North Texas over the past 40+ years.
In this guide, our expert technician Matthew from The Printing Workshop will walk you through exactly how to replace the transfer belt cleaner on a Xerox AltaLink B8200 Series copier.
Table of Contents
- What Is a Transfer Belt Cleaner?
- When Does a Transfer Belt Cleaner Need to Be Replaced?
- How to Replace a Transfer Belt Cleaner on a Xerox AltaLink B8200
- Common Mistakes to Avoid
- Quick Recap
- FAQ
What Is a Transfer Belt Cleaner?
A transfer belt cleaner removes excess toner from the transfer belt during the printing process. This helps maintain image quality and prevents unwanted toner buildup inside the copier.
During printing, toner is transferred onto paper using several internal imaging components. Any toner that remains on the transfer belt after printing must be cleaned away before the next print cycle begins.
The transfer belt cleaner is responsible for this task. A worn transfer belt cleaner can lead to toner buildup inside the machine.
While users don't replace this component as frequently as toner cartridges, it is a normal maintenance item that will eventually require replacement.
When Does a Transfer Belt Cleaner Need to Be Replaced?
You should replace the transfer belt cleaner when the copier displays a maintenance message indicating that the component has reached the end of its service life.
In most cases, the Xerox AltaLink B8200 will automatically track the life of the transfer belt cleaner and notify you when replacement is needed.
You may see:
- A "Replace Transfer Belt Cleaner" message
- A maintenance notification on the control panel
- An alert through your print management software
How Do You Replace the Transfer Belt Cleaner on a Xerox AltaLink B8200?
To replace the transfer belt cleaner on a Xerox AltaLink B8200, open the front cover, remove the waste toner transport assembly, unlock and remove the transfer belt cleaner, install the new unit, and reassemble the machine.
Below is the complete step-by-step process.
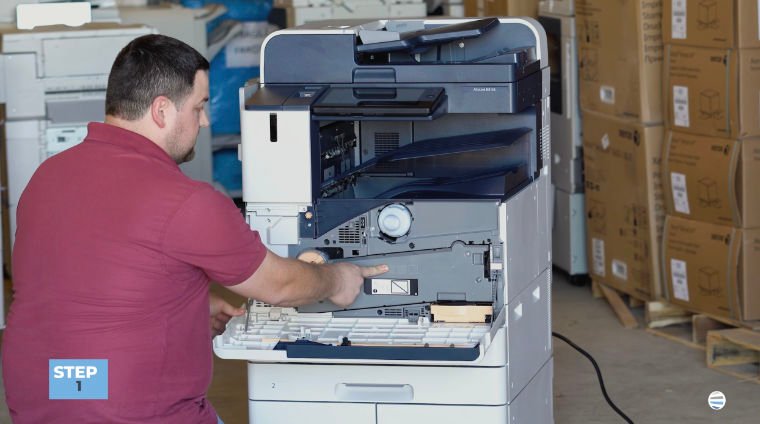
Step 1: Open the Front Cover
Begin by opening the copier's front cover.
This gives you access to the maintenance components located inside the machine.
Before proceeding, take a moment to identify the waste toner transport assembly, as it will need to be removed first.
Step 2: Unlock and Remove the Waste Toner Transport Assembly
Locate the waste toner transport assembly at the front of the machine.
To remove it, unlock the assembly by pressing the side handles.
Then pull the assembly straight out and set it aside carefully.
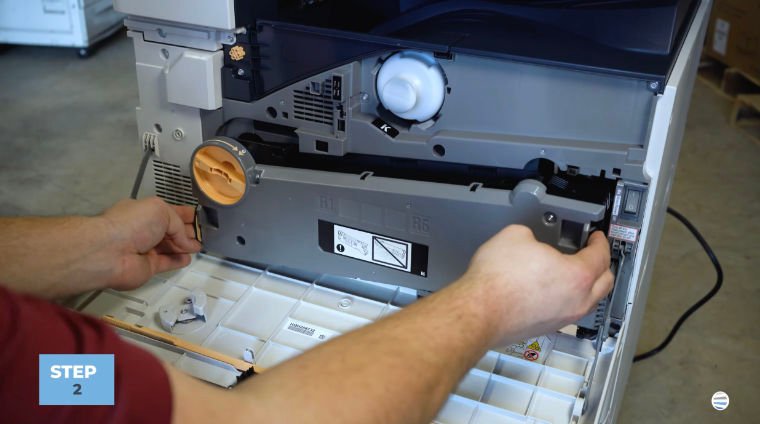
Removing this assembly provides access to the transfer belt cleaner located deeper inside the machine.
Expert Tip: Place the assembly on a clean, stable surface while you complete the replacement.
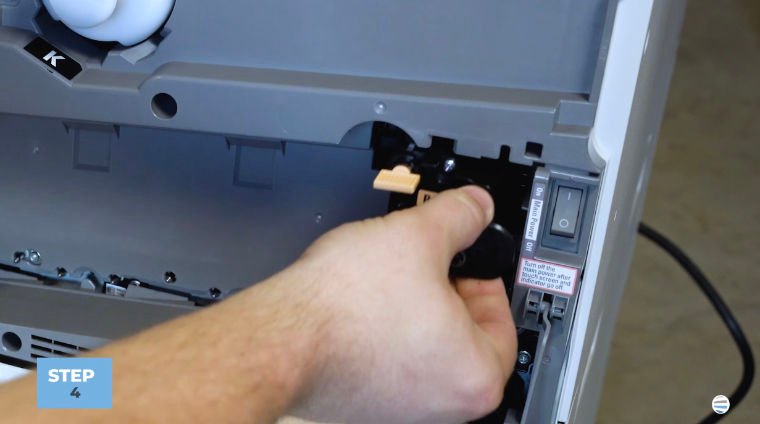
Step 3: Unlock the Transfer Belt Cleaner
Look inside the cavity where the waste toner transport assembly was located.
In the upper-right corner, you'll find the transfer belt cleaner, labeled R6.
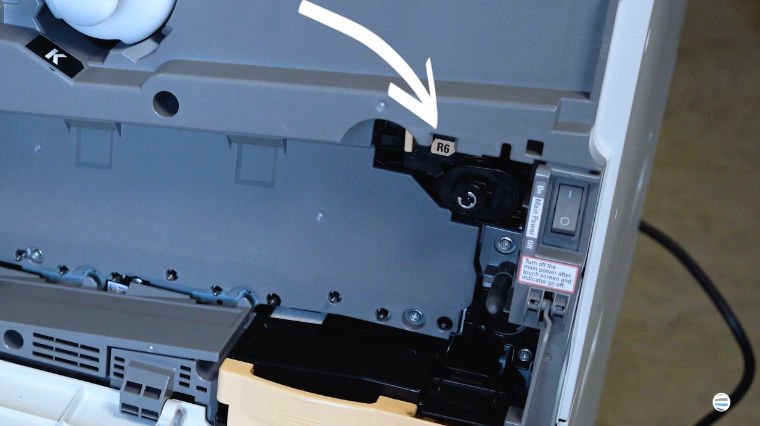
Locate the orange locking handle and turn it counterclockwise.
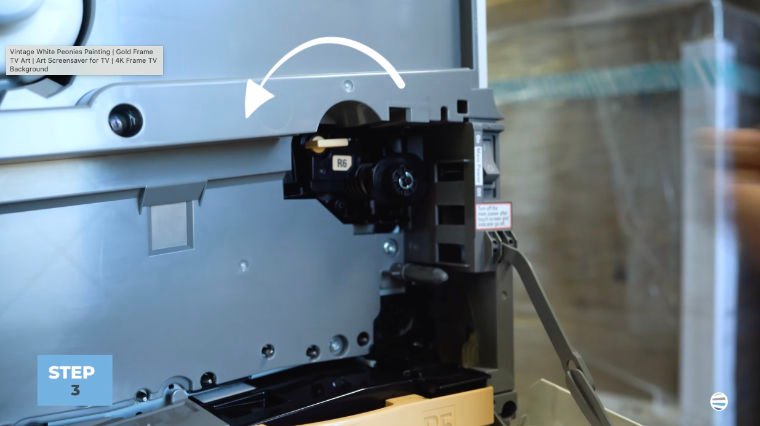
This unlocks the transfer belt cleaner and prepares it for removal.
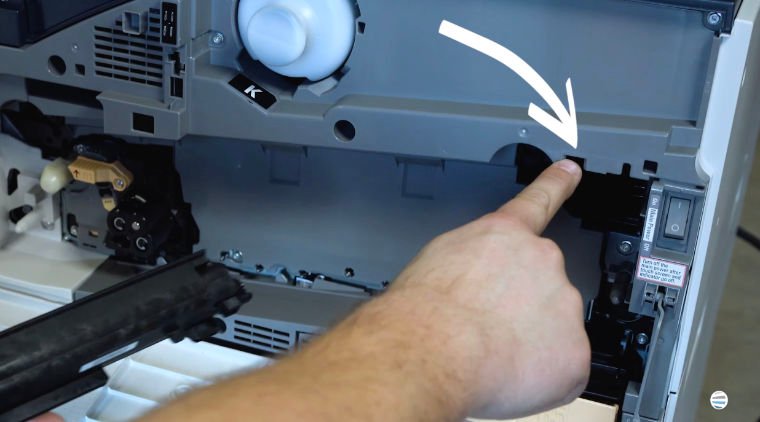
Step 4: Remove the Transfer Belt Cleaner
Once unlocked, grasp the transfer belt cleaner and pull it straight out.
The assembly should slide out smoothly without excessive force.
Important: Pull the unit straight out rather than twisting or angling it during removal. This helps prevent damage to the guides and alignment points.
Step 5: Install the New Transfer Belt Cleaner
You'll notice a guide on the top of the transfer belt cleaner that aligns with a matching slot inside the copier.
To install it, align the guide with the slot. Then, carefully position the cleaner and slide it straight into the machine.
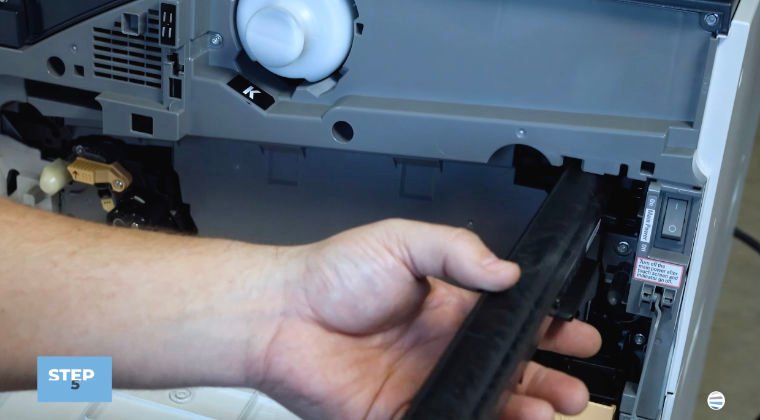
Once aligned correctly, it should move into place smoothly.
To be sure you installed it correctly, the transfer belt cleaner should:
- Slide in easily
- Sit flush in the compartment
- Fully seat inside the machine
If you encounter resistance, remove it and verify the alignment before trying again.
Step 6: Lock the Transfer Belt Cleaner
Once the cleaner is fully inserted, turn the orange handle clockwise approximately one-quarter turn to lock the assembly into place.
A properly locked transfer belt cleaner helps ensure the copier operates correctly after replacement.
Step 7: Reinstall the Waste Toner Transport Assembly
Take the waste toner transport assembly that you removed earlier and insert it back into position.
Use both thumbs and apply even pressure on each side while pushing it into place.
Continue pressing until both sides click securely.
Step 8: Lock the Waste Toner Transport Assembly
Once fully seated, turn the orange locking mechanism to secure the assembly.
Double-check that everything is locked before closing the machine.
Step 9: Close the Front Cover
Close the front cover.
Your Xerox AltaLink B8200 should now recognize the newly installed transfer belt cleaner and return to normal operation.
You're ready to get back to printing.
Common Transfer Belt Cleaner Replacement Mistakes to Avoid
While the procedure is relatively simple, there are a few common mistakes that can create unnecessary issues.
Forgetting to Unlock the Assembly First
Always turn the orange handle counterclockwise before attempting removal.
Misaligning the Guide During Installation
The guide on the top of the transfer belt cleaner is designed to ensure proper positioning. Make sure it lines up with the slot before sliding the unit in.
Not Fully Locking the New Cleaner
After installation, remember to rotate the orange handle clockwise to secure the assembly.
Forcing Components Into Place
If something doesn't slide in smoothly, stop and verify alignment rather than applying more force.
These simple precautions can help ensure a successful replacement on the first attempt.
FAQ
What does a transfer belt cleaner do?
A transfer belt cleaner removes excess toner from the transfer belt so that toner does not accumulate inside the copier.
How do I know when the transfer belt cleaner needs to be replaced?
The Xerox AltaLink B8200 will typically display a maintenance message when replacement is required.
Where is the transfer belt cleaner located?
The transfer belt cleaner is located inside the copier behind the waste toner transport assembly and is labeled R6.
What happens if I don't replace the transfer belt cleaner?
A worn transfer belt cleaner may reduce the machine's ability to remove excess toner, which can affect overall print performance.
Is replacing a transfer belt cleaner difficult?
No. Most users can complete the replacement in just a few minutes by following the proper steps.
Proper Transfer Belt Cleaner Replacement Helps Maintain Reliable Performance
The transfer belt cleaner might not be one of the most visible components inside your Xerox AltaLink B8200, but it helps keep the machine operating efficiently and maintain consistent print quality.
By properly replacing the transfer belt cleaner, you can help prevent toner buildup and keep your copier performing as intended.
At STPT, we help businesses maintain Xerox and non-Xerox equipment so they can maximize their uptime and extend their device’s life.
Want More Xerox Maintenance Tutorials?
If you found this guide helpful, be sure to subscribe to The Printing Workshop on YouTube.
By subscribing, you’ll get access to more printer maintenance tips, troubleshooting guides, and how-to videos that help keep your devices running smoothly.
The Printing Workshop provides practical, easy-to-follow advice from technicians who work on these machines every day.
