 Skip to main content
Is your Xerox VersaLink C625 printer giving you dull prints, random smudges, or wrinkled paper? The culprit might just be your fuser. Many people don’t realize how essential the fuser is until their print quality nosedives or their machine starts jamming. If you’re dealing with inconsistent output or frequent breakdowns, it’s probably time to replace this critical component.
In this blog, you’ll learn exactly when and why to replace your fuser, and you’ll get a step-by-step guide from a seasoned printer technician who’s done it thousands of times. His name is Matthew, and he's one of the experts from Strategic Technology Partners of Texas (STPT). Our STPT team has been in the trenches, repairing thousands of printers across industries and organizations.
At, STPT we know our stuff, and more importantly, we know how to make this easy for you.
By the time you finish this article, you’ll know:
- How to confidently replace the fuser on your Xerox VersaLink C625
- What signs to look for when your fuser is going bad
- How to avoid costly downtime by staying on top of printer maintenance
Let’s dive in.
What’s a Fuser and Why Should You Care?
The fuser is the part of your laser printer that heats and presses toner into the paper to create a permanent image. Without it, your documents would smear, smudge, or peel off. In short, no fuser = no real prints.
Over time, the fuser wears out. Heat, pressure, and friction take a toll. If you’re seeing:
- Faded text
- Uneven toner distribution
- Wrinkled or curled paper
- Smudges or black streaks
- Frequent paper jams
…it’s a strong sign your fuser is either dirty, damaged, or completely worn out.
Manufacturers recommend replacing the fuser every 100,000 to 200,000 pages, but depending on your usage and environment, you may need to do it sooner.
Step-by-Step: How to Replace the Fuser on a Xerox VersaLink C625
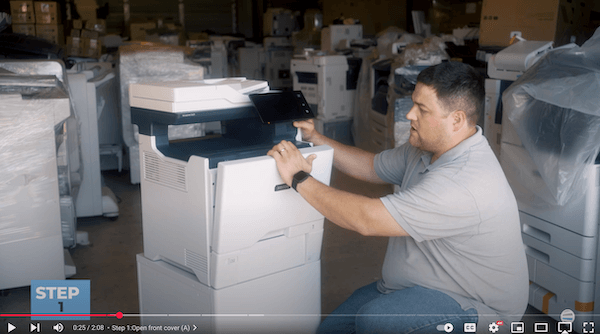
Step 1: Open the Front Cover (Cover A)
First, grab the top of the white cover (located at the front of the machine) and pull it down. Let it hang in place.
Step 2: Turn Off the Machine
Inside, you’ll see a yellow warning label indicating that the fuser is hot.
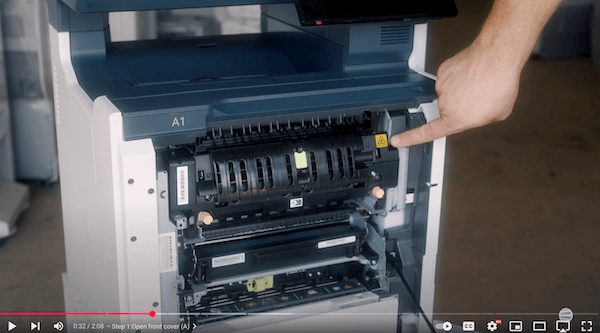
Always turn off your machine before touching internal components. It’s safer for you and the machine.
Step 3: Unscrew the Orange Screws
You’ll see two spring-loaded orange knobs near the top of the fuser.
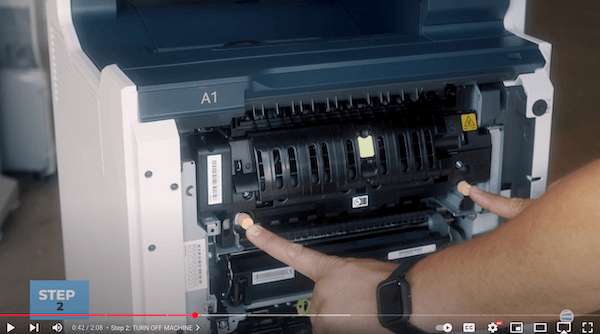
Unscrew them (counter-clockwise) completely. They’ll slightly “pop out” when fully released.
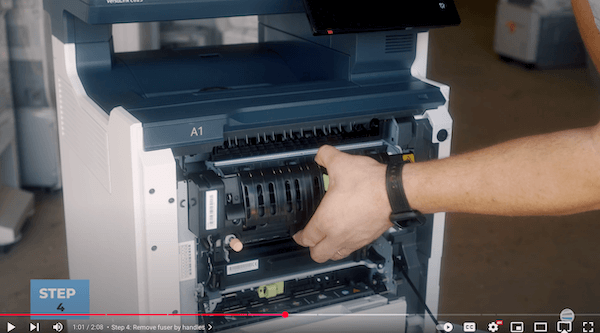
Step 4: Remove the Old Fuser
At the bottom of the fuser, you’ll notice a handhold.
Grab the built-in handle and pull the fuser straight out. Be cautious, it may still be warm.
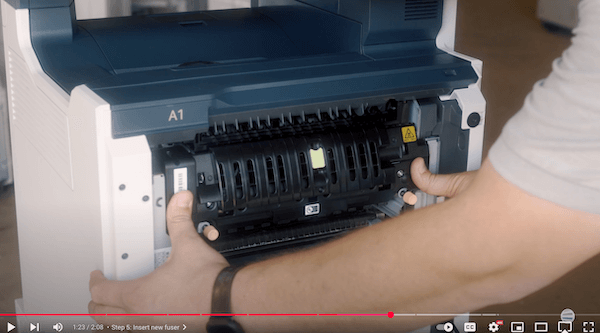
Step 5: Insert the New Fuser
Notice the metal shelf where the fuser will go.
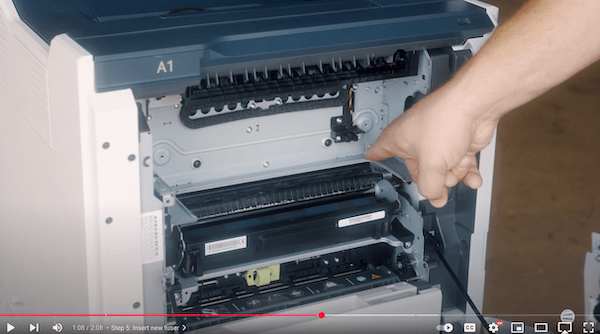
Slide the new fuser onto the metal shelf inside the cavity. It should go in smoothly until you feel a bit of resistance. Push it in firmly with both your thumbs. It should feel like it clicks or “seats” magnetically.
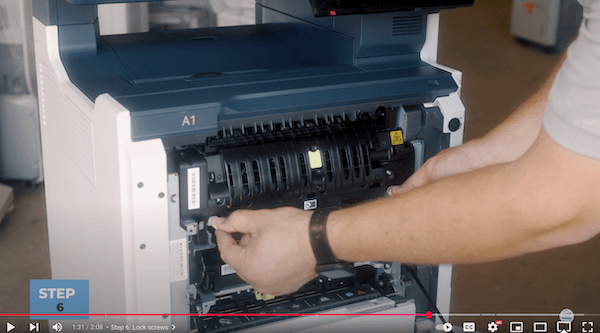
Step 6: Lock It In
Push the orange knobs in and turn them (clockwise) until they stop. Don’t over-tighten, just enough to secure the unit.
Step 7: Close the Front Cover
Flip the front door back up until it snaps into place.
Step 8: Power On the Printer
Turn your machine back on and wait for it to initialize. You’re done!
Why Replacing Your Fuser Matters
Ignoring a failing fuser doesn’t just affect print quality; it affects everything:
- Output gets unreliable, wasting toner and paper.
- Jams become more frequent, leading to downtime.
- Repairs become more expensive, especially if damage spreads to other parts.
- Your team’s productivity drops, especially if the printer is critical to operations.
This one small fix can make a huge difference. Clean, crisp prints, fewer service calls, and a printer that does what it’s supposed to without drama.
Related Read: How Much Does Printer Service Cost?
Stay Ahead of Printer Problems
You’ve now learned how to replace the fuser in your Xerox VersaLink C625 and why it’s crucial to keep this component in top shape. With just a few minutes of effort, you’ve saved yourself from poor prints, jammed jobs, and productivity-killing downtime.
Want more tips like this? There’s more where that came from.
Subscribe to our YouTube channel - The Printing Workshop
Get expert walkthroughs, maintenance hacks, and troubleshooting tips straight from seasoned techs like Matthew. By subscribing to our YouTube channel, The Printing Workshop, you’ll gain valuable insights to tackle any printer issue confidently.
Don’t wait until your printer breaks. Learn how to keep it running like new.
Subscribe today and stay print-ready.
If you experience any challenges or face a complicated printer issue, please reach out to us. Our expert printer technicians are ready to assist you.
