 Skip to main content

A drop in print quality can be due to several factors, but if your Xerox VersaLink C500 or C505 printer is displaying a "Replace Drum” message, then this is most likely the cause.
Thankfully, replacing a drum is an easier maintenance task than it might seem.
Unlike toner cartridges, drums don't need to be replaced as often. Still, they play a critical role in the printing process. Over time, the drum will wear down through normal use and you may notice streaks, faded prints, recurring marks on the page, or get a maintenance alert from the printer tell you to replace it.
At Strategic Technology Partners of Texas (STPT), we've serviced thousands of Xerox printers over the past 40+ years. In this guide, our printer technician Matthew from The Printing Workshop will show you exactly how to replace the drums on a Xerox VersaLink C500 or C505 printer.
Table of Contents
- What Does a Drum Do in a Xerox VersaLink Printer?
- When Should You Replace a Drum?
- How to Replace the Drum on a Xerox VersaLink C500 or C505
- Why Should You Clean the LED Lens?
- Common Drum Replacement Mistakes to Avoid
- Quick Recap
- FAQ
What Does a Drum Do in a Xerox VersaLink Printer?
A drum is an imaging component that helps transfer toner onto paper to create the text and images you see on each printed page.
While toner supplies the powder used to create the image, the drum transfers that image accurately onto the paper.
Because the drum experiences wear over time, Xerox designed it as a replaceable maintenance item.
When Should You Replace a Drum?
You should replace the drum when your Xerox VersaLink C500 or C505 displays a drum replacement message or when print quality begins to deteriorate.
Common signs that a drum may need replacement include:
- Repeating marks on pages
- Faded print quality
- Streaks or lines
- Uneven image quality
- Drum replacement notifications
The printer continuously monitors your drum’s condition and typically alerts you when it’s approaching the end of its service life.
How Do You Replace the Drum on a Xerox VersaLink C500 or C505?
To replace the drum on a Xerox VersaLink C500 or C505, open the right-side cover, remove the waste toner container, unlock and remove the drum, install the new drum, clean the LED lens, and reassemble the printer.
Below is the complete step-by-step process.
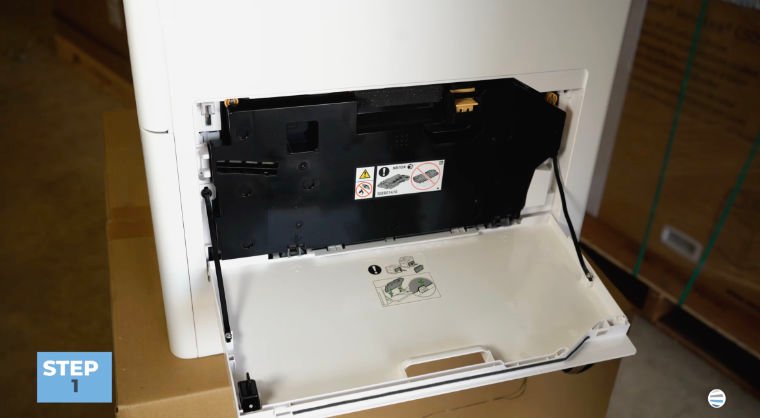
Step 1: Open the Right-Side Cover
Start by opening the printer's right-side cover to access the waste toner container and drum assemblies.
Step 2: Remove the Waste Toner Container
To remove the waste toner container, press down on the orange release button and carefully roll the container outward to remove it.
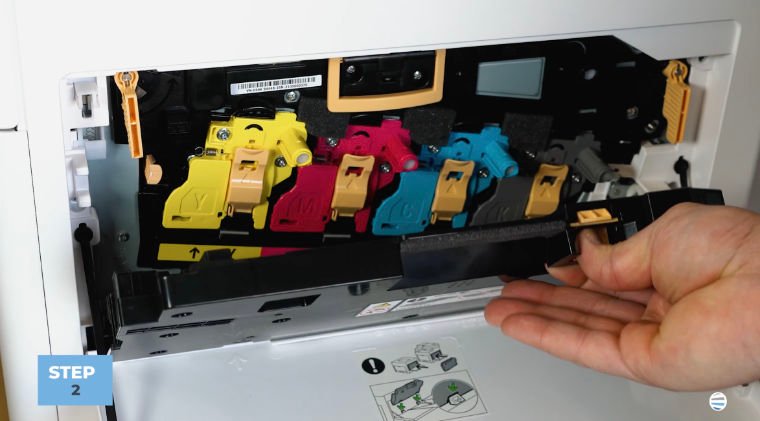
Set it aside in a safe location while you replace the drum.
Expert Tip: Place the waste toner container on a flat surface to avoid accidental spills.
Step 3: Unlock the Drum
To unlock the drum, locate the orange latch handle and pull it downward.
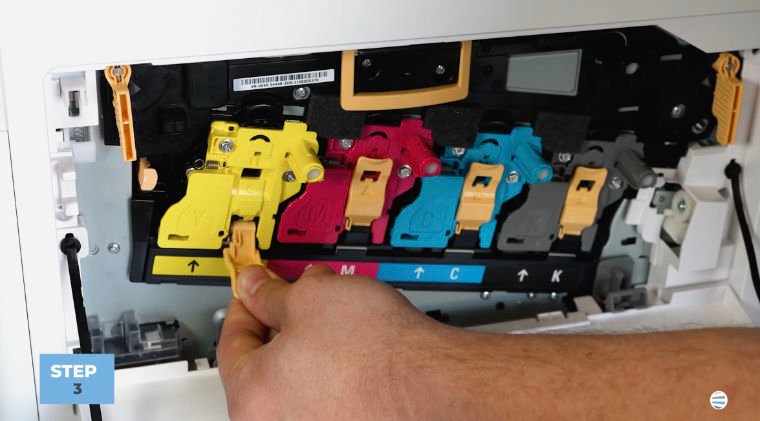
The drum is now unlocked and ready to be removed.
Step 4: Remove the Drum
Using the same orange handle, carefully pull the drum straight out. Make sure to support the drum from underneath while removing it.
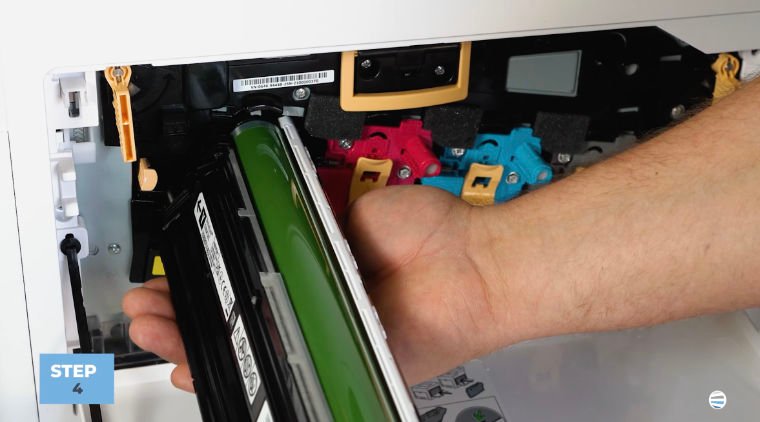
Important: Avoid Touching the Green Surface
The green imaging surface on the drum is sensitive.
Touching, scratching, or nicking this surface can negatively affect print quality.
To help protect the drum:
- Avoid touching the green surface.
- Handle the drum by its plastic housing.
- Keep the drum away from sharp objects.
Step 5: Install the New Drum
To install the replacement drum, position the drum with the drum side facing upward.
Then align it with the slot inside the printer and slide it into place. Continue pushing until it is fully seated.
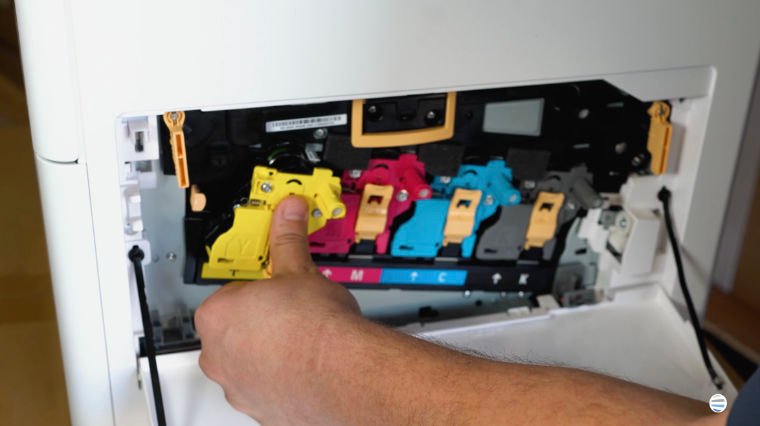
If installed correctly, the drum should:
- Slide in smoothly
- Sit evenly inside the printer
- Fully seat in its designated position
If the drum does not move in easily, remove it and verify alignment before trying again.
Step 6: Relock the Drum
Once the drum is fully installed, lift the orange lock handle back into position.
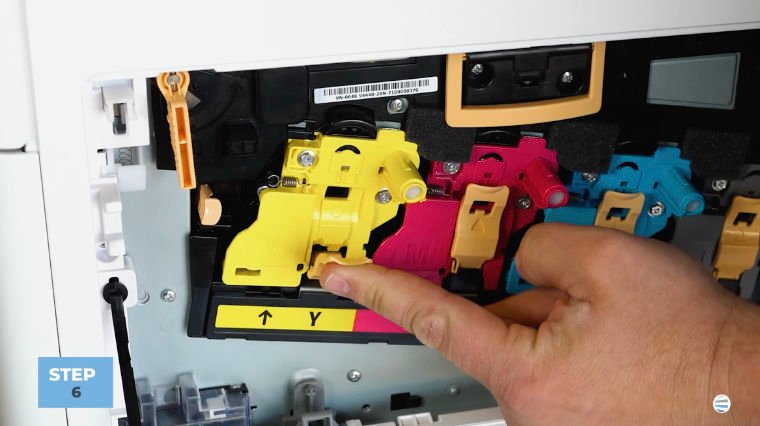
This secures the drum and prepares the printer for operation.
Step 7: Clean the LED Lens
Before reassembling the printer, take a moment to clean the LED lens.
Inside the printer, you'll find a cleaning rod with a horseshoe shape.
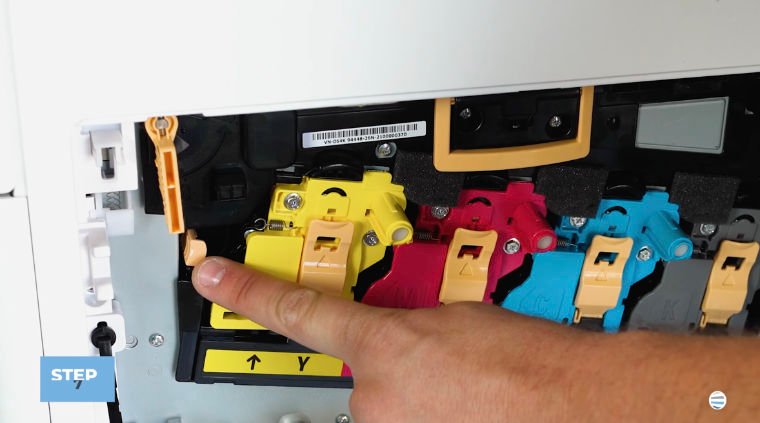
You'll also notice a matching horseshoe-shaped opening near the drum assembly.
To clean the lens, insert the cleaning rod into the opening and run it through the lens area approximately three times.
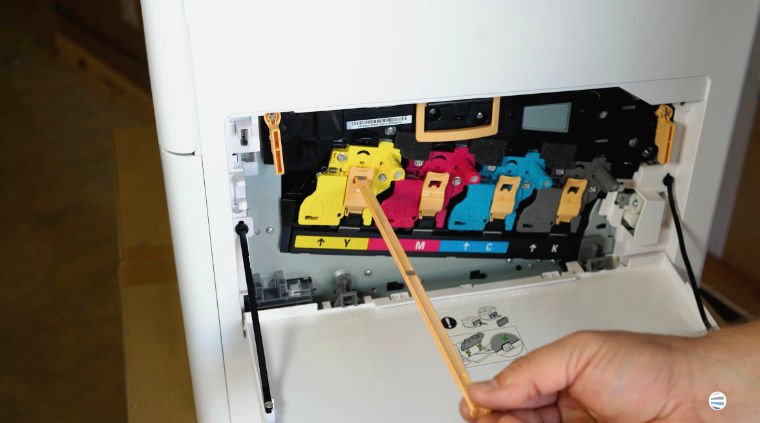
Once done, remove the rod and store it back to its original place. Cleaning the lens helps remove dust or debris that could affect image quality.
Step 8: Reinstall the Waste Toner Container
To reinstall the waste toner container into its gray trough, place it in the guide area and roll it into position.
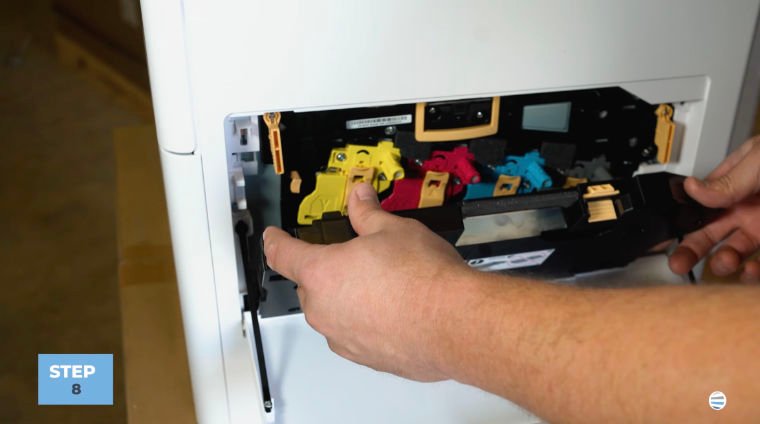
Then, push until it latches securely. Make sure the container is fully seated before continuing.
Step 9: Close the Right-Side Cover
Close the right-side cover.
Your Xerox VersaLink C500 or C505 should now recognize the newly installed drum and return to normal operation.
Why Is Cleaning the LED Lens Important?
Cleaning the LED lens during drum replacement helps maintain image quality by removing dust and debris that can interfere with the imaging process.
While it’s important to replace the drum itself, cleaning the lens is equally as important.
A clean lens means you maintain crisp text, sharp graphics, and consistent print quality.
Common Drum Replacement Mistakes to Avoid
Replacing a drum is straightforward, but there are a few mistakes worth avoiding.
Touching the Green Drum Surface
This is the most common mistake and can negatively affect print quality.
Skipping the LED Lens Cleaning Step
Cleaning the lens only takes a few seconds and helps maintain image quality.
Forcing the Drum Into Place
If the drum doesn't slide in easily, verify the alignment rather than pushing harder.
These simple precautions can help ensure a successful installation the first time.
Quick Recap
Here's the process in a simplified format:
- Open the right-side cover.
- Remove the waste toner container.
- Unlock the drum.
- Remove the old drum.
- Install the new drum.
- Relock the drum.
- Clean the LED lens.
- Reinstall the waste toner container.
- Close the cover.
FAQ
What does a drum do in a Xerox VersaLink C500 or C505?
A drum helps transfer toner onto paper and creates the images and text that appear on printed pages.
How do I know when my drum needs replacement?
The printer will typically display a drum replacement message when the component reaches the end of its service life.
Can I touch the green drum surface?
No. Touching the green surface can damage the drum and affect print quality.
Why do I need to clean the LED lens?
Cleaning the LED lens removes dust and debris that can affect image quality.
Is the drum the same as toner?
No. Toner is the powder used to create images, while the drum transfers those images onto the paper.
Proper Drum Replacement Helps Maintain Print Quality
A properly installed drum helps produce sharp text, vibrant colors, and professional-looking documents, while an improperly installed or damaged drum can lead to frustrating print quality issues.
We’ve worked with Xerox equipment for decades, and simple maintenance procedures like this often make the difference between smooth operation and avoidable downtime.
Want More Xerox Maintenance Tutorials?
For more Xerox how-to videos, troubleshooting guides, and printer maintenance tips, subscribe to The Printing Workshop on YouTube.
You’ll get expert printer maintenance advice and step-by-step tutorials that help keep your Xerox devices running smoothly.
