Skip to main content
Your printer should never be a point of stress in your life.
Office equipment should be dependable; it should run optimally and interrupt your work as little as possible.
One way to make sure your work life (and printer) runs smoothly is to replace damaged parts and service your machine on time, every time.
In this article, we’re going to provide you with instructions that will help you quickly replace the waste toner container on a Xerox VersaLink C500 series printer.
Without the waste toner container, your printer can’t run as optimally or effectively store toner waste, but sometimes, the waste container is treated as an afterthought.
However, this part is vital for the health of your printer and needs to be replaced when damaged.
The waste container replacement process varies between models, which can make it complicated for people who don’t know much about printer maintenance, and the relatively simple process of changing parts can be made even more complicated by poorly written instruction inserts.
Luckily, watching someone else replace the waste toner container on the same Xerox machine or reading a quick how-to article before you try replacing a part on your own is a great, easy way to save yourself valuable time.
At STPT, we make it our goal to provide quality printing information that is easy to understand, so you know where to go to find answers to your print questions. We want to make sure your office equipment is never a point of stress in your life.
Our top-notch service technician, Matthew, is going to walk you through the replacement process step-by-step.
In this blog, he’ll explain how to quickly change the waste toner container on several different Xerox printer models so you can get back down to business.
As a service technician at STPT, Matthew simplifies printer maintenance. His how-to quick printer fixes on YouTube have been a big hit, so he’s put together this article to provide a quick, easy-to-read tutorial for those of you who prefer written directions.
Take the pressure off by trusting our STPT printer specialists to help you through it. With almost 40 years in the business, our team has the expertise to make the replacement process quick and easy for you.

Waste Toner Replacement for Xerox VersaLink C500s and C600s Series Printers
Toner is a powdery substance applied to paper to create an image when you print or copy on a laser machine. Laser printer toner is usually contained within an easy-to-use cartridge to keep things from getting messy.
Xerox waste toner containers are designed to work with specific models of printers. They help contain extra toner and waste products, so your printer can continue to produce quality prints without interruption.
Xerox waste containers are made to be easy to replace so you can get back to work, but sometimes it helps to have someone walk you through the process step-by-step.
In this how-to guide, Matthew explains how to replace waste toner containers for the following compatible Xerox printer models:
• VersaLink C500
• VersaLink C505
• VersaLink C600
• VersaLink C605
For the purposes of this how-to guide, Matthew will be walking through waste container replacement on a Xerox VersaLink C05 model printer, but the process is the same for any compatible printer model.
Different machines have different supply items and settings. That’s why it is important to follow the instructions specific to your Xerox printer model. For more information about replacing other parts on different Xerox printer models, check out:
• How To Replace the Toner on Your Xerox Printer (VersaLink C500s and C600s)
• How To Replace the Toner on Your Printer (VersaLink C400s, Phaser 6600, WorkCentre 6600s)
• How To Replace the Maintenance Kit on Your Xerox VersaLink C400s Series Printer
Let’s uncomplicate printer maintenance by walking through toner replacement. You can follow the process by reading the written instructions provided below (with pictures) or you can watch the video linked at the top of the blog.
Part One: Remove Old Waste Toner Container
1. Open the right-side cover on your printer. Once opened, the inside of your printer will look like this:
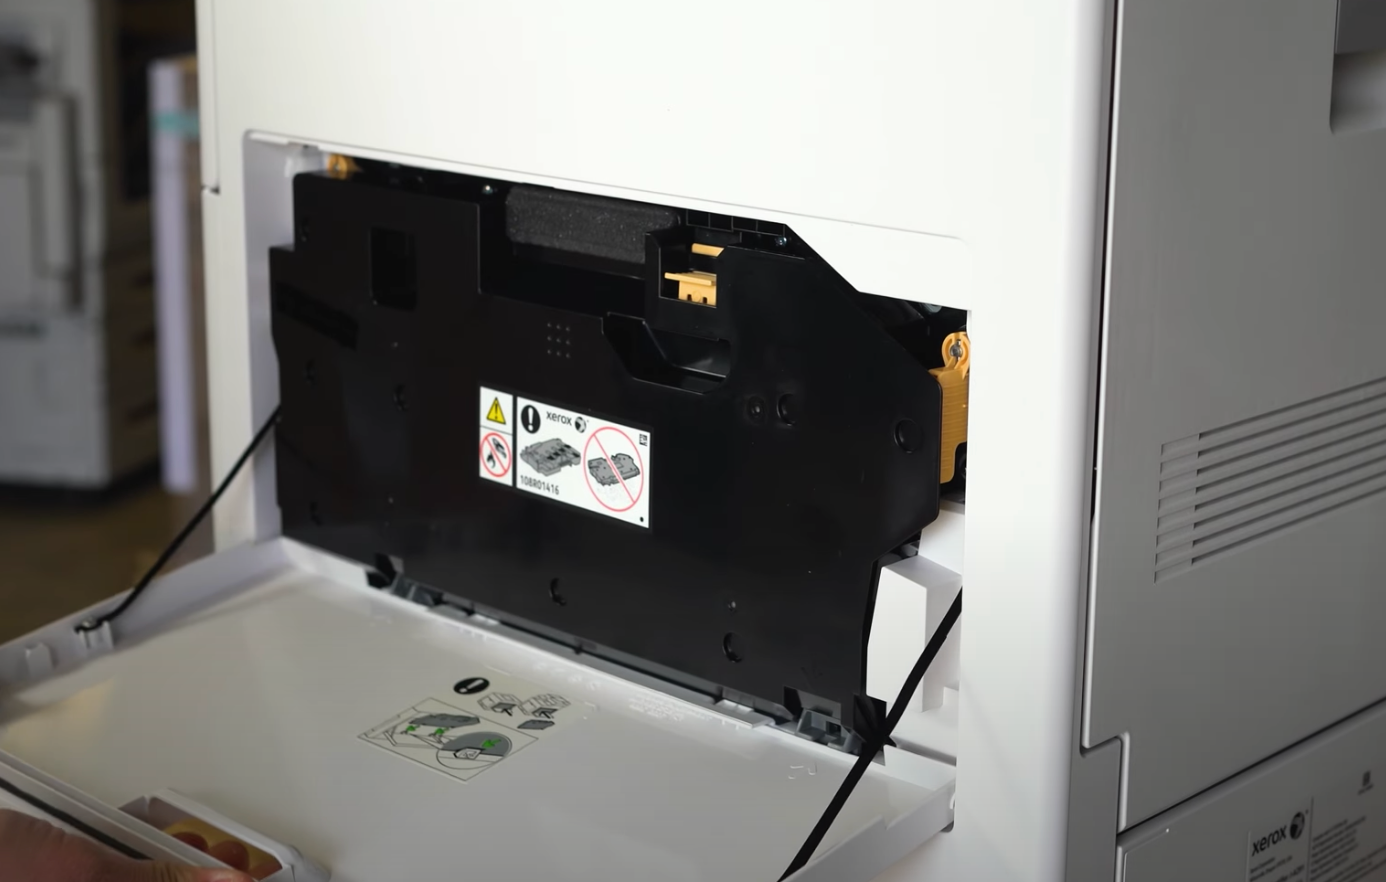
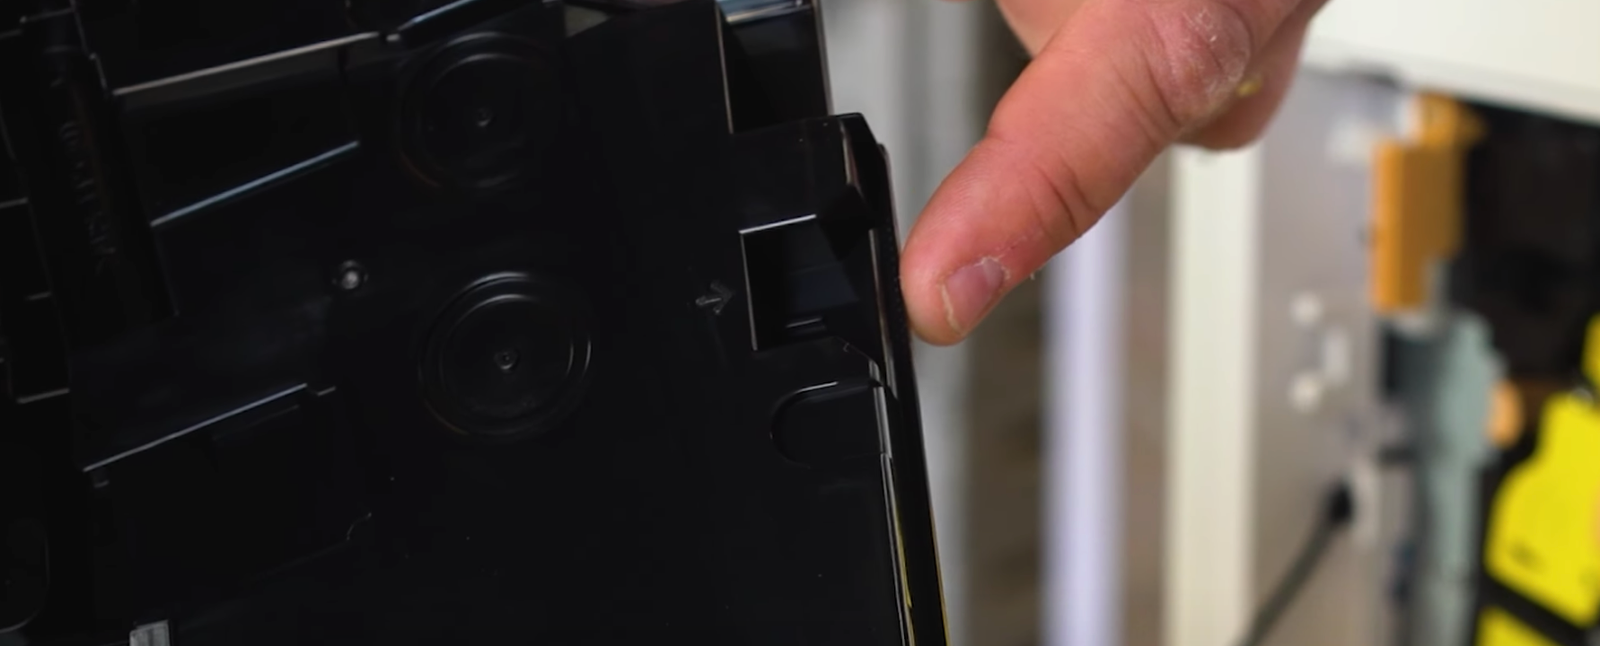
2. The black rectangular piece of plastic (shown above) is your waste toner container.
3. To remove the waste toner container, you need to unlock it using the yellow button. You will engage the button by pushing down on it.
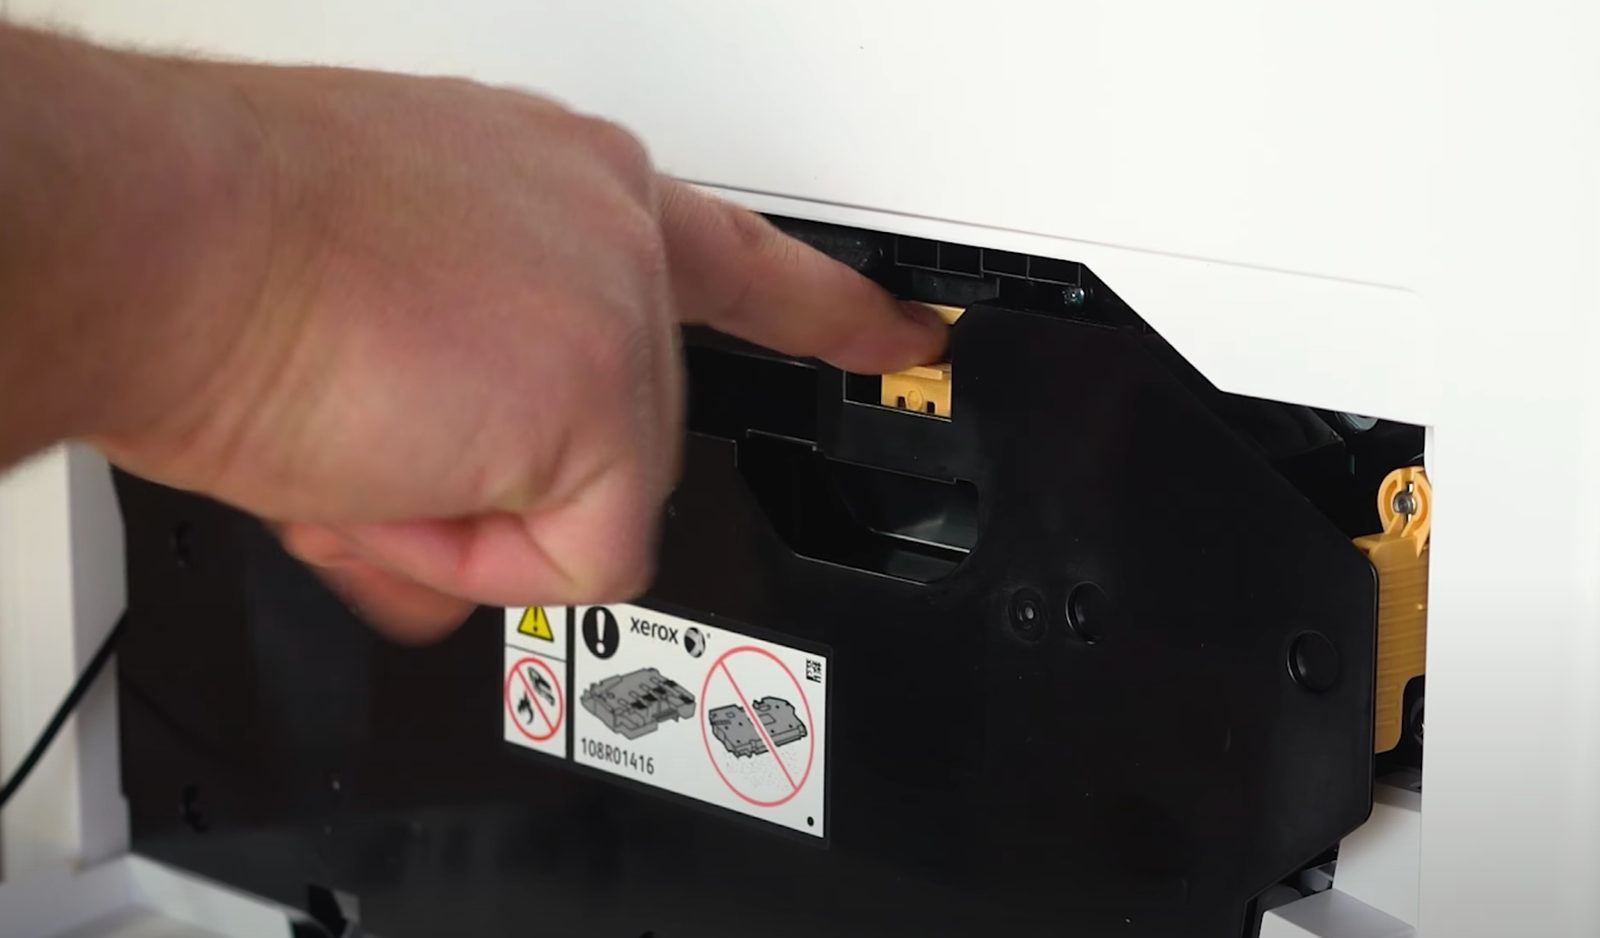
4. Roll the container down so that it begins to open. On top, you’ll see a handle.
5. Grab the handle and lift the container out of the machine.
Part Two: Insert New Waste Toner Container
1. Your new waste toner container will come in a box like this:
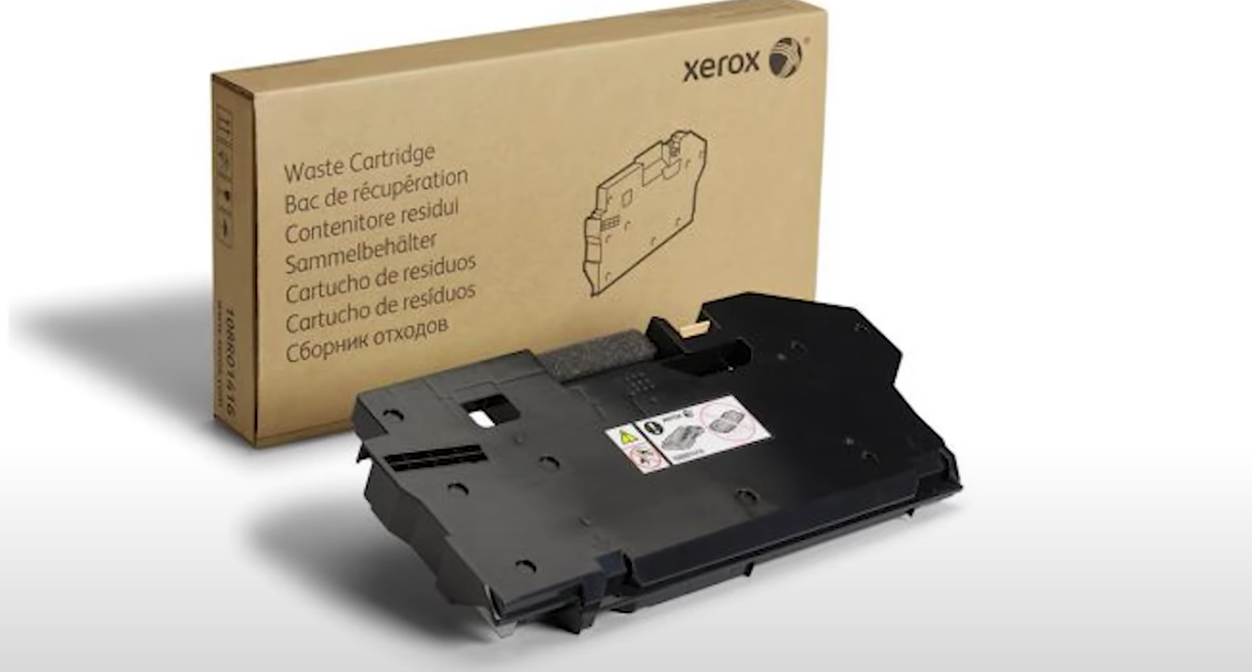
2. Take your new waste toner container out of the box.
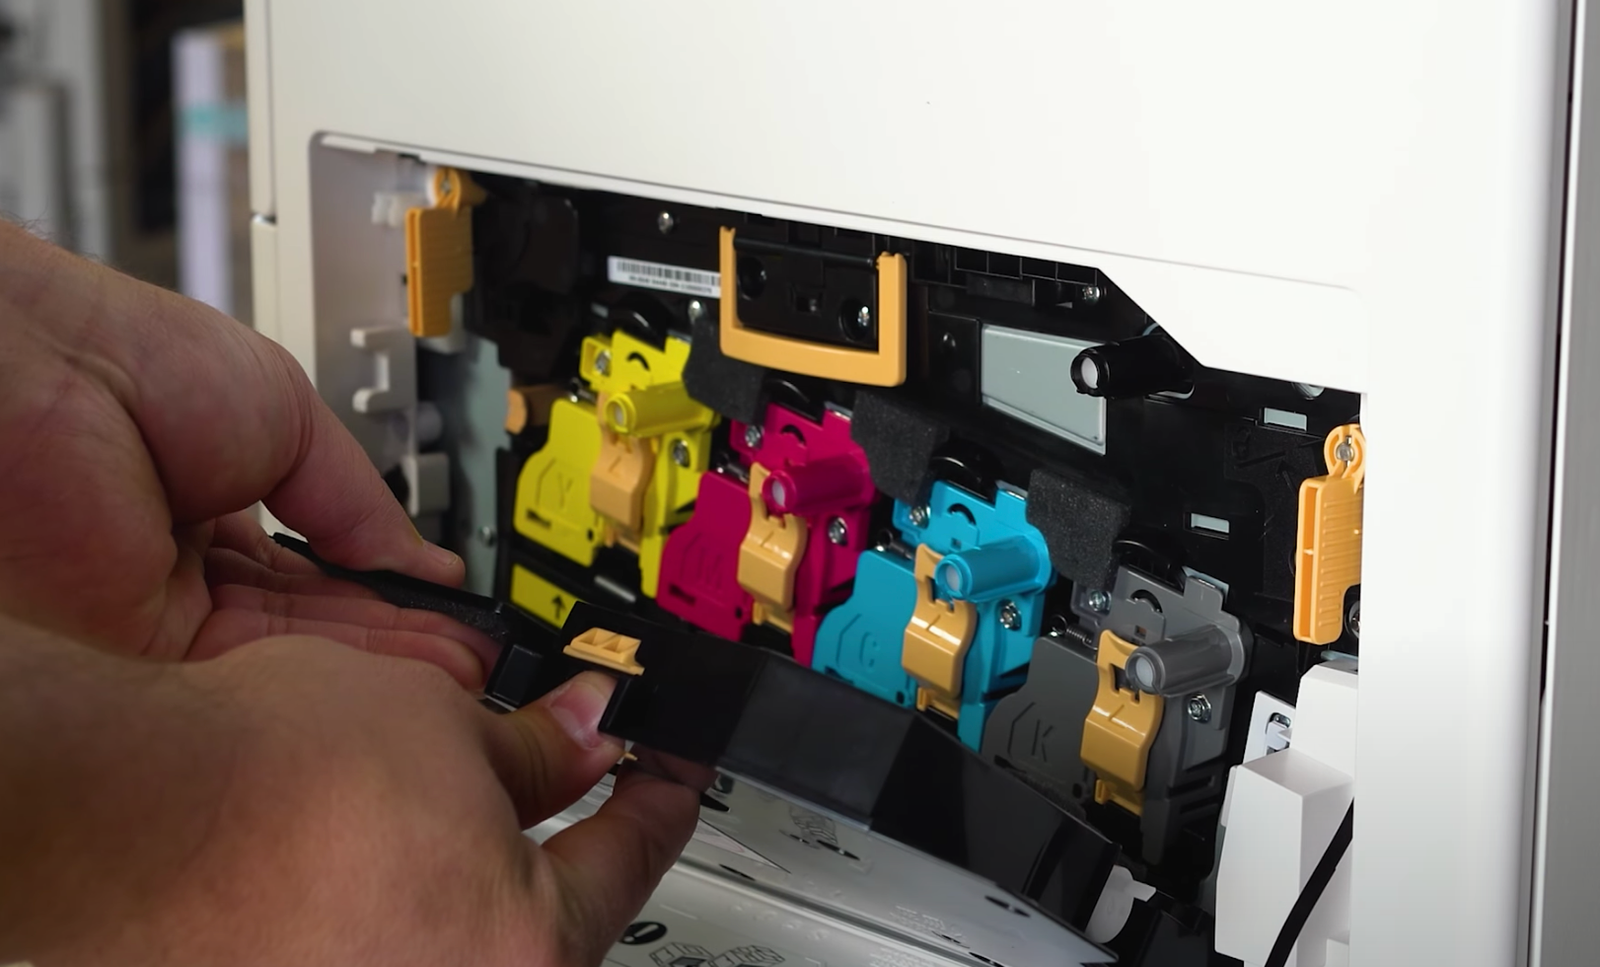
3. Insert the new waste toner container into the slot on the machine. First, pinpoint the gray arrows and flanges at the corners of the new container:
4. Next, find the gray trough pieces on the face of the machine. The flanges sit in the gray troughs.
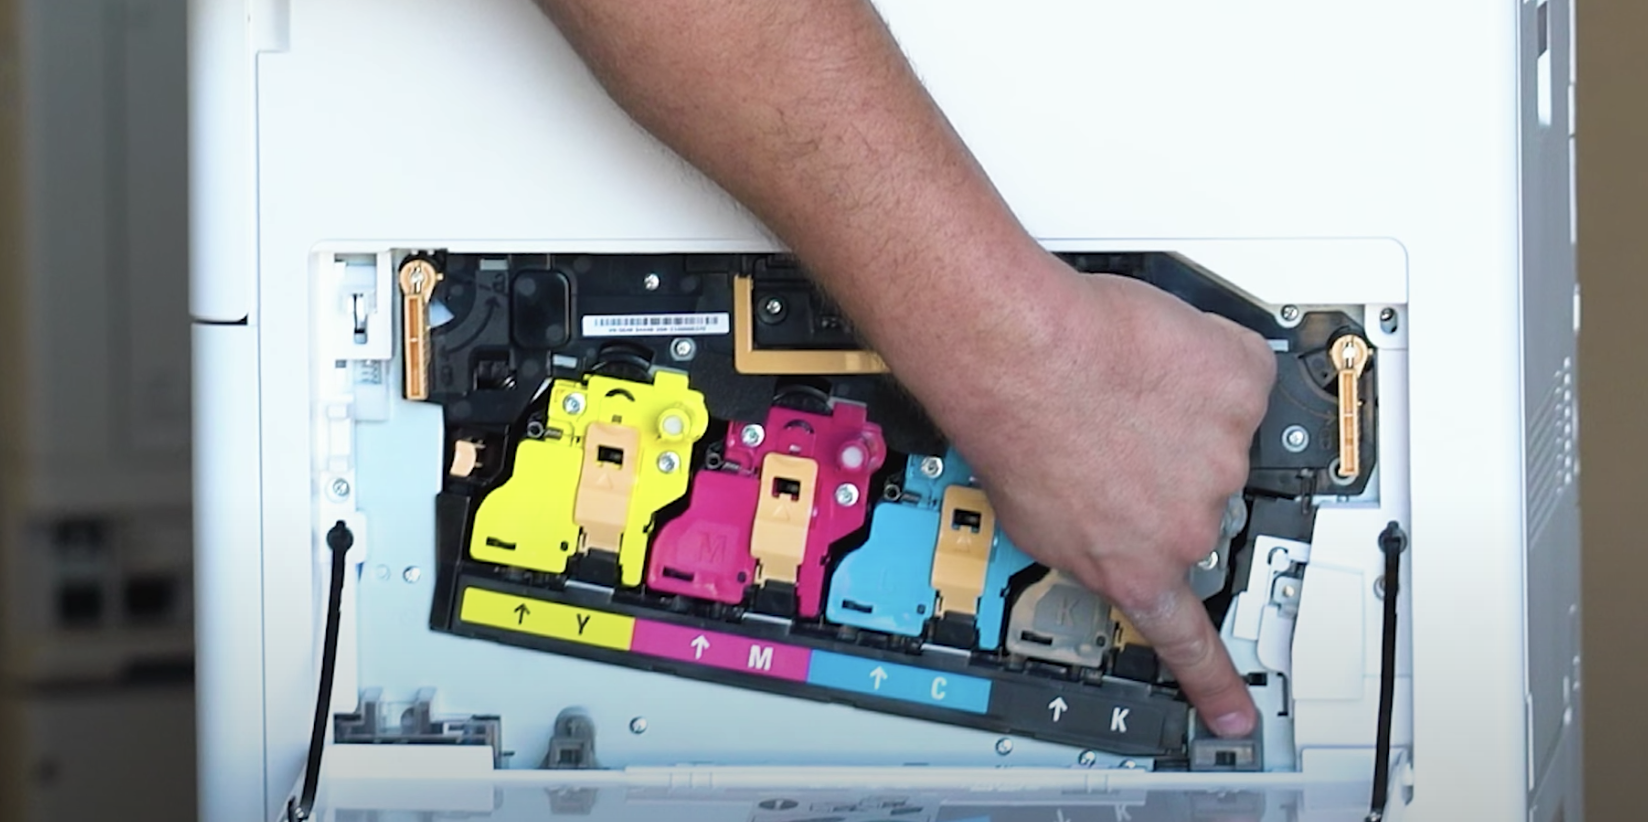
5. Set the new waste toner container in the toughs, roll it in, and then push it in until the button latches with a click at the top.
6. Shut the cover on your printer.
And that’s it!
Your waste container should be properly installed so you can get back to work without any printer maintenance hassles.

Need Another Quick Printer Fix?
If you want to make your printer’s maintenance quicker and easier, check out our YouTube channel.
The Printing Workshop gives you free access to all our YouTube video tutorials. Let our service technicians and print experts walk you through simple tech solutions for your Xerox printer.
Have a Problem with Your Copier Printer that isn’t a quick fix? Reach out to us. We’d love to help.