 Skip to main content
In today's fast-paced world, we all know how vital it is to keep our equipment in top-notch condition to avoid any disruptions in our workflow. When it comes to printing, maintenance is key to ensuring consistent quality outputs. So, if you're facing any trouble replacing the fuser in your Xerox PrimeLink C9065, don't worry - we've got you covered!
We understand how overwhelming it can be, especially if you're new to this. That's why we've put together a step-by-step guide that is easy to follow, even for beginners. We'll walk you through the process, making it a breeze so you can return to focusing on your work with peace of mind.
Note: This guide can be used for the Xerox PrimeLink C9065/C9070 and for the Xerox Color C60/C70 models.
If you’re not covered by a service plan and are interested in understanding the cost associated with one, Check out our blog on the cost of printer services.
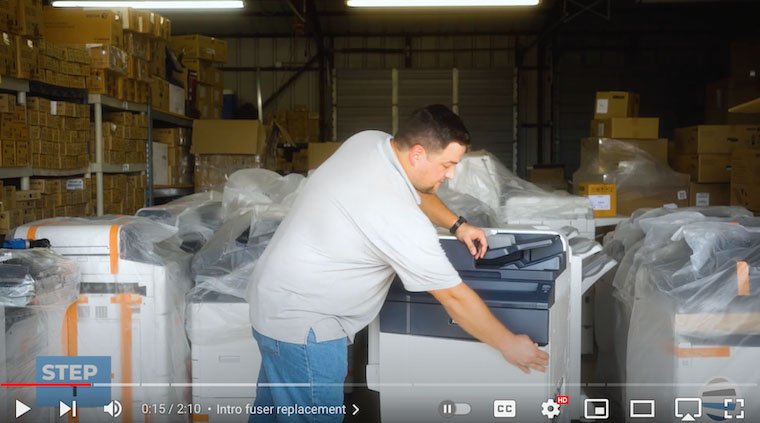
Step 1: Open Front Cover
To initiate the fuser replacement process, start by opening the front cover of your Xerox PrimeLink C9065. You’ll be able to access the internal components that need attention.
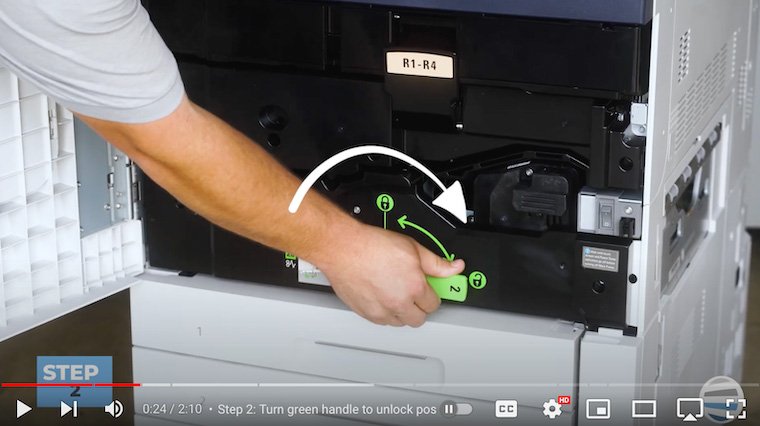
Step 2: Turn Green Handle to the Unlock Position
Locate the green handle at the bottom of the front cover with the number two on it. Turn the handle until it reaches the unlocked position. This step is crucial for releasing the mechanism that holds the fuser in place.
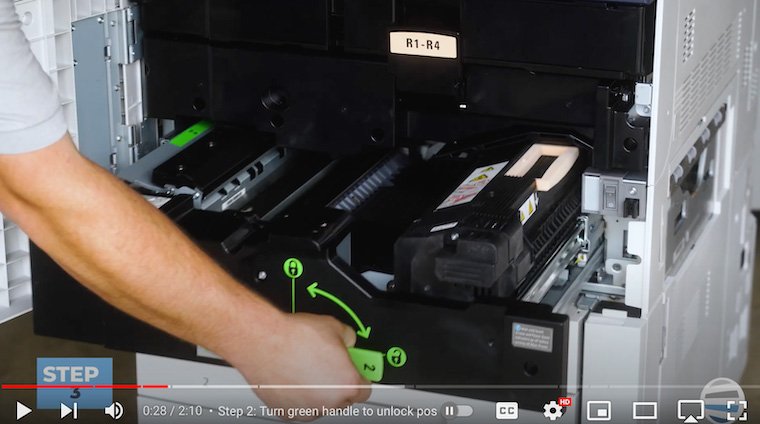
Step 3: Use Green Handle to Pull Out Drawer
Once the green handle is in the unlocked position, pull out the drawer from the bottom. This drawer contains the fuser assembly that needs to be replaced.
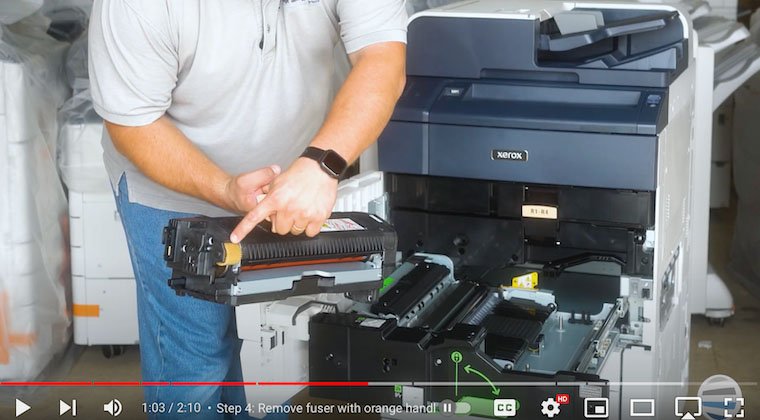
Step 4: Remove Fuser with Orange Handle
On the right side of the drawer, you'll find the fuser assembly. To remove the fuser, grasp the orange handle on top, pull it straight up, and swing it out of the drawer. Be cautious as the fuser can be hot.

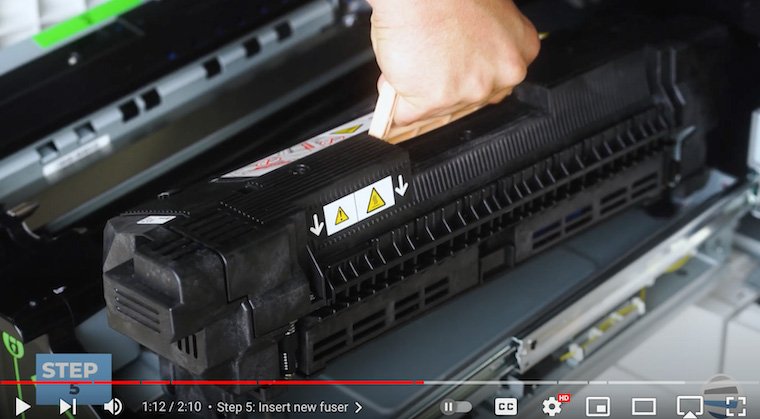
Step 5: Insert New Fuser
Unwrap your new fuser and hold it by the handle. When inserting the new fuser, ensure that the big white-yellowish gear (pictured below) is positioned toward the rear.
Insert it at a slight angle, swing the front down, and let it sit in place. Avoid applying force, as the components should align naturally.
Step 6: Close Drawer
With the new fuser securely in place, close the drawer gently by pushing it in.
Step 7: Place Green Handle in Lock Position
To secure the drawer and fuser assembly, return the green handle to the lock position. This step is vital for preventing any potential mishaps during printing operations.
Step 8: Close Front Cover
Once the drawer is locked, close the front cover of the Xerox PrimeLink C9065.
Seamless Printing Awaits: Elevate Your Workspace with Xerox PrimeLink C9065 Fuser Expertise!
Great job! You've just uncovered how to effortlessly replace your Xerox PrimeLink C9065 fuser. This will not only make routine maintenance a breeze but also empower you with a valuable skill. By following the step-by-step guide, you're not only fixing a printer component but also taking charge of your printing experience.
Imagine a workspace where every print job is a success, and there's no more downtime. That's the promise of mastering fuser replacement – a crucial step towards a seamless printing workflow. Thanks to Xerox’s modular approach to the C965 and similar models, customers can replace components like a fuser with greater ease.
As you follow the carefully outlined steps, you're not just extending the life of your Xerox printer; you're investing in your own productivity. The satisfaction of knowing you can handle printer maintenance on your own is liberating. No more waiting for technicians or struggling with complicated procedures.
If you’d like to know more about printer longevity, check out our blog on 8 tips to increase the lifespan of your printer/copier.
Ready for more tips?
Our journey doesn’t have to end here. Like and subscribe to our YouTube channel, The Printing Workshop, for more empowering how-to content. Stay connected to a community that believes in the power of knowledge. Together, we'll continue to explore, learn, and conquer every challenge your printing environment may throw your way.
Don't let a printer issue hold you back from completing your work. Contact us right away if you want efficient and reliable solutions for your printer problem. Our team of highly trained technicians will be more than happy to help.
