 Skip to main content
If you have received a message on your Xerox machine's control panel stating that the waste toner container needs replacement, you may be in a rush to find a quick tutorial to get your printer working again. We understand that in today's fast-paced office environment, printers are essential tools, and it's crucial to know how to maintain and replace essential components without affecting productivity. Lucky for you, we've created an easy-to-follow guide that will help you quickly replace the waste toner container.
This guide will delve into the steps required to replace the waste toner container on a Xerox PrimeLink C9065. However, it will also work for the C9070, C60, and the C70. Follow along as we break down each step to make this seemingly complex task a breeze.
If you’d like to see our review of the Xerox PrimeLink C9065, check out our review article.
How to Replace the Waste Toner Container on a Xerox PrimeLink C9065
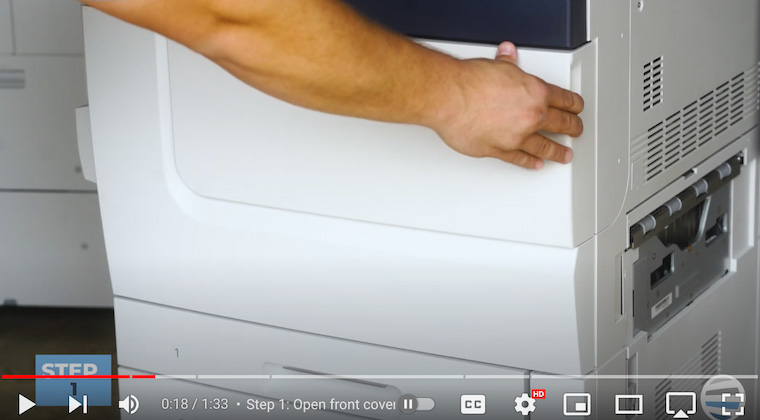
Step 1: Open the Front Cover
Open the front cover to access the waste toner container. It sets the stage for a smooth replacement process and showcases the user-friendly design of the Xerox PrimeLink C9065.
Step 2: Open a Small Cover on the Bottom Right
Locate and open a small cover in the bottom right corner. It should swing out to reveal the waste toner container.

Step 3: Pull Out the Waste Toner Container
The waste toner container has a handle with an orange line. Place your finger underneath the handle to grasp it and pull out the waste toner container. Note that the container will be full of black powder, so it's important to exercise care and precision. If you do spill toner, you can vacuum it but be sure not to get it wet.

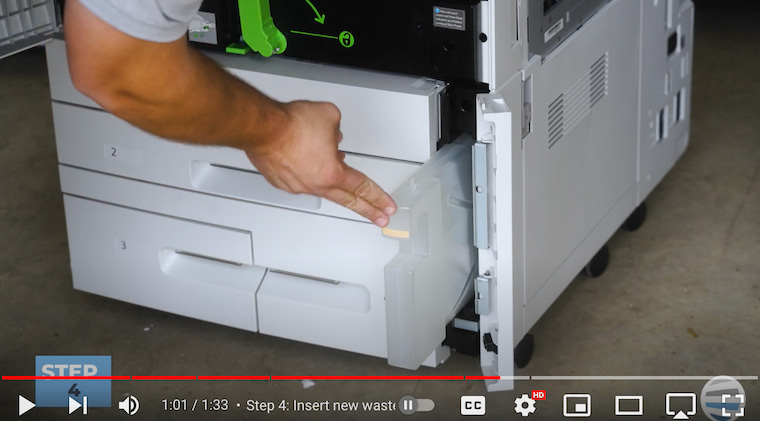
Step 4: Insert New Waste Toner Container
Now it’s time to insert a new waste toner container. Slide the container right back into the empty slot until it clicks into place.
Step 5: Close the Side Door & Front Cover
Close the side door securely and close the front cover. You’ve successfully replaced your waste toner container and your printer is ready for its next task!
The Waste Toner Replacement Process Simplified
Just like toner is essential to your Xerox PrimeLink printer, the waste toner container is equally important. It serves as a filter that gathers toner residue, but the container needs to be removed once it is full. This article provides you with a detailed guide to replacing the waste toner container easily. Thanks to Matthew's instructions, you can confidently perform this task without any hassle. If you want to simplify your printer maintenance routine, this step-by-step guide is an excellent resource to follow.
Please remember to be careful when handling toner as it can create a lot of dust.
Want More Tips?
If this guide was helpful, make sure to check out our other how-to guides in our Learning Center. Also, subscribe to our YouTube channel, The Printing Workshop, for more insightful how-to videos on various printer models in the Xerox lineup.
If you're experiencing printer issues, don't hesitate to reach out to us. Our trained technicians are available to help you find a solution.
