 Skip to main content

Are you tired of fumbling through your Xerox VersaLink or AltaLink’s cluttered printer interface, searching for the apps you need?
At Strategic Technology Partners of Texas (STPT), we understand the frustration of inefficient printing workflows. We’ve been selling Xerox printers for nearly four decades in the North Texas area and Southern Oklahoma. We understand all there is to know about Xerox technology, and we’re here to help you improve your printing experience.
In this blog, we’ll delve into the step-by-step process of customizing the user interface on your Xerox VersaLink and AltaLink printers. By tailoring the interface to your specific needs, you can simplify tasks, boost productivity, and make printing a seamless part of your workflow. We’ll show you the steps to customize your home page and your apps.
Table of Contents
- Why Customize?
- What is Xerox’s ConnectKey Enabled User Interface?
- How to Customize Your Home Screen Using the Control Panel
- How to Customize Your Apps
- What Else Can You Customize?
Why Customize?
Picture this: You’re juggling deadlines, and that printer screen feels like a maze. You’re not alone. Many users grapple with the same challenge. That’s where customization comes in. Whether you’re a scanning aficionado, a cloud enthusiast, or simply someone who values efficiency, we’ve got you covered. By customizing your printer’s user interface, you can boost your productivity. We’ll also delve into the hidden features within those app icons. Let’s dive in!
What is Xerox’s ConnectKey Enabled User Interface?
But first, here’s a little introduction to the ConnectKey-enabled user interface (UI). Xerox introduced this technology in 2017 for its AltaLink and VersaLink multifunction printers (MFPs). It allowed users to access apps, utilize cloud printing capabilities, streamline workflows seamlessly, and much more.
Xerox's vision with ConnectKey was clear: to offer customers a modern touchscreen interface akin to the intuitive feel of smartphones and tablets. The emphasis was on delivering app-based services that simplify the printing process and elevate user convenience.
The intuitive design, packed with apps, provides easy customization. This feature gives each user on a printer the ability to personalize their printing experience. With customization/personalization options, users can tailor their printing environment to their liking and ultimately enhance their productivity in their printing environment.
Need to customize your control panel for maximum efficiency? You can choose to display only the apps that you need and prioritize your most-used ones at the top. Hide or show specific features of individual apps and configure default settings to meet the needs of your workgroup. Save job settings for repeated use.
Let's explore how you can fine-tune your home screen to align seamlessly with your workflow requirements.
How to Customize Your Home Screen Using the Control Panel
The following steps are taken from the Xerox website. The exact steps might be different depending on your VersaLink or AltaLink printer model and the software version installed. For more specialized information, refer to your printer manual. We’ve utilized Xerox’s ConnectKey UI simulator to provide visuals to help you better understand.
Note: To customize either your home screen or apps, you need to log in (and later log out) as a system administrator first.
Follow these steps first to customize your home panel:
- Once you’ve logged in as System Administrator at the control panel, press the Home button.
- Touch Log In. Type your Username using the keypad, then touch Next. Type your Password using the keypad, then touch Done.
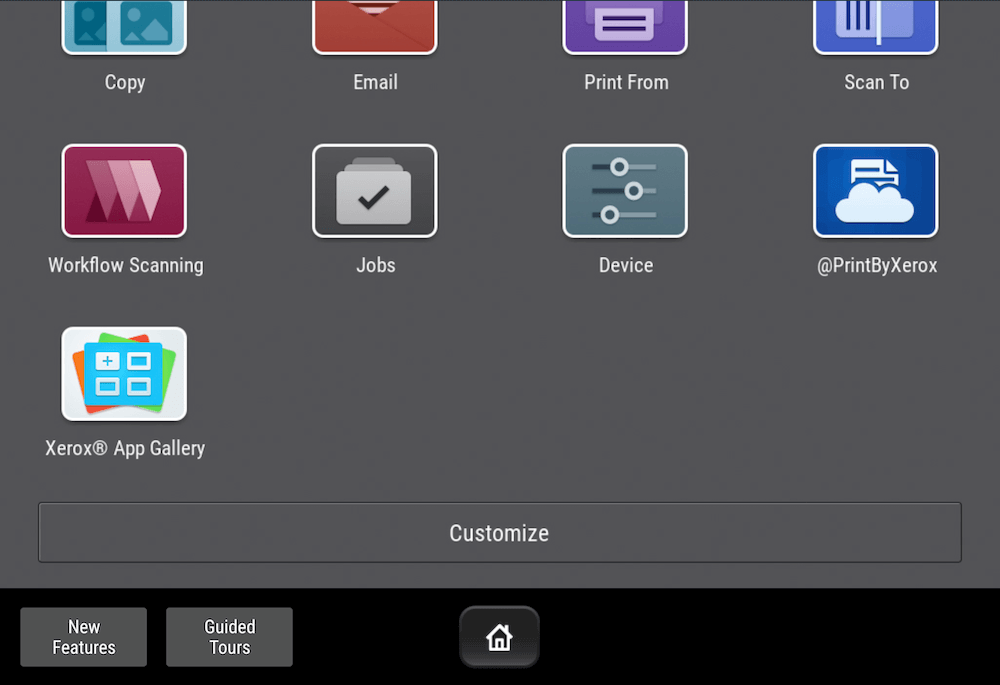
- Scroll to the bottom, then touch Customize.
Touch Customize Home.
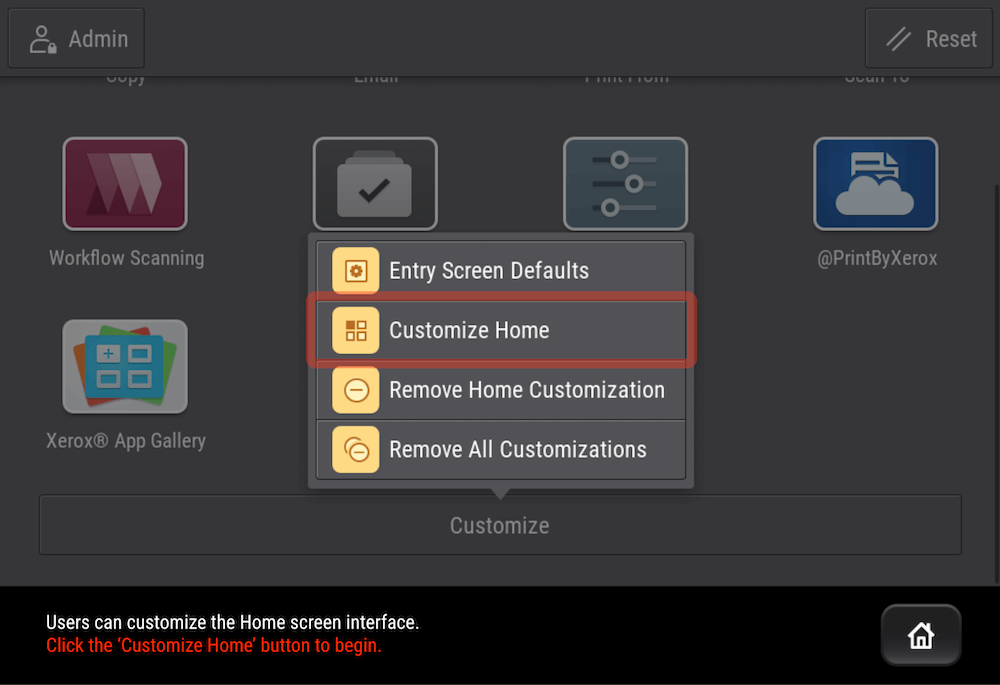
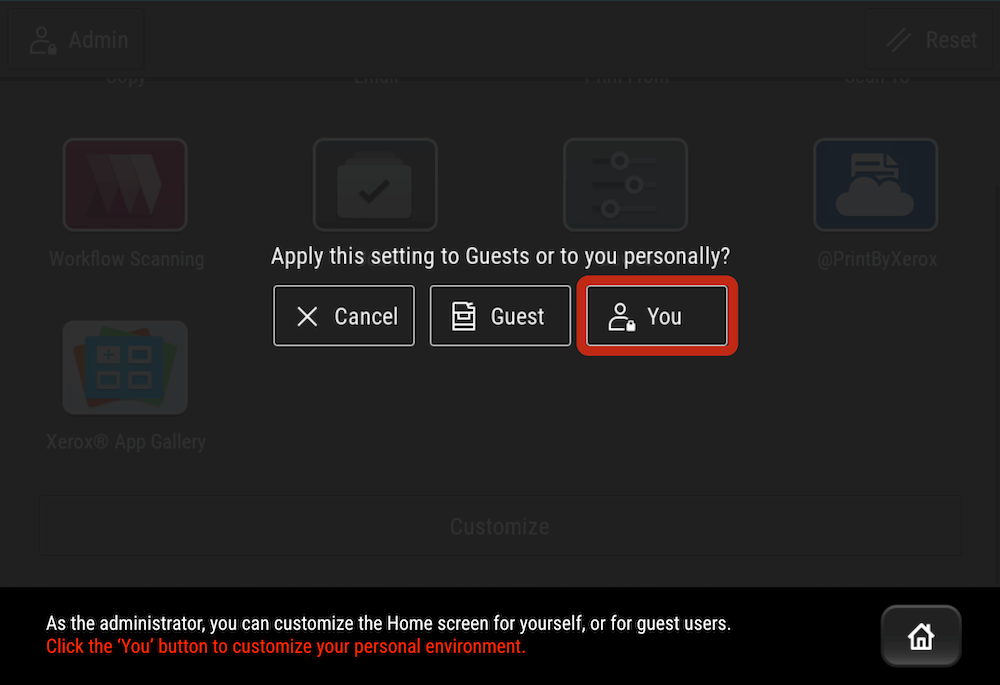
You have the option to customize the home for yourself or for guests.
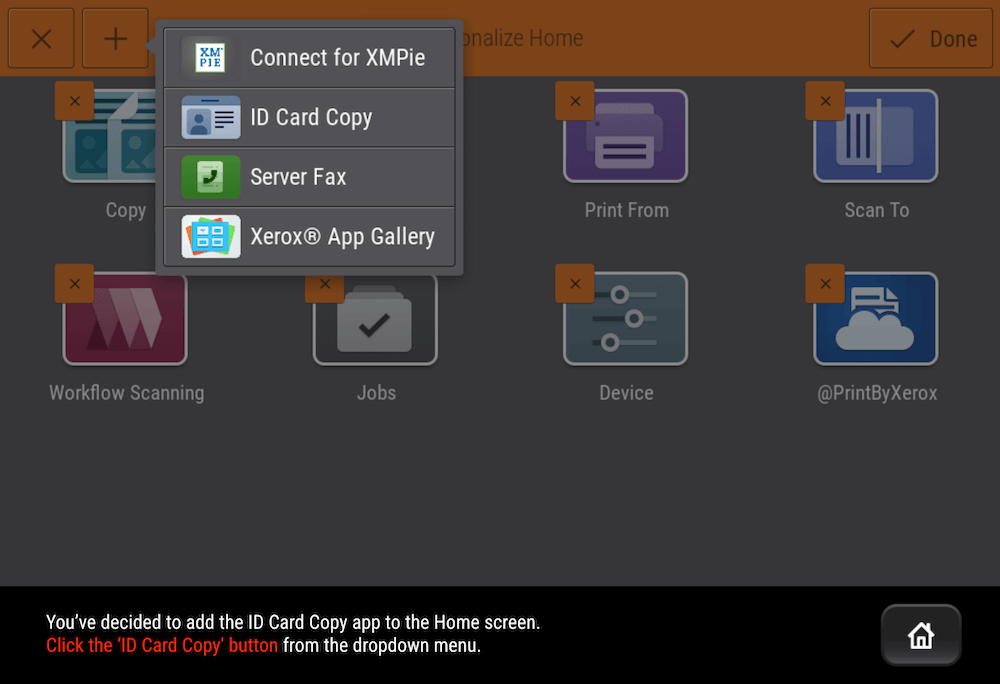
Displaying or Hiding an App on the Home screen:
To display an installed but hidden app:
Touch the Plus (+) icon.
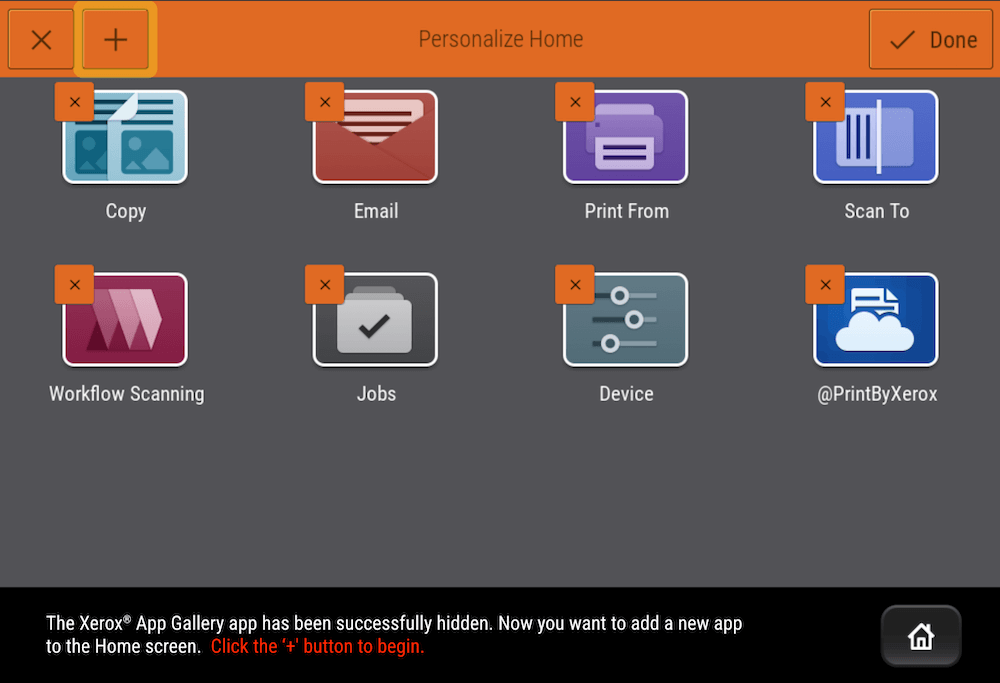
- Touch the app that you want to appear on the control panel.
To hide an installed app:
For the required app, touch X.
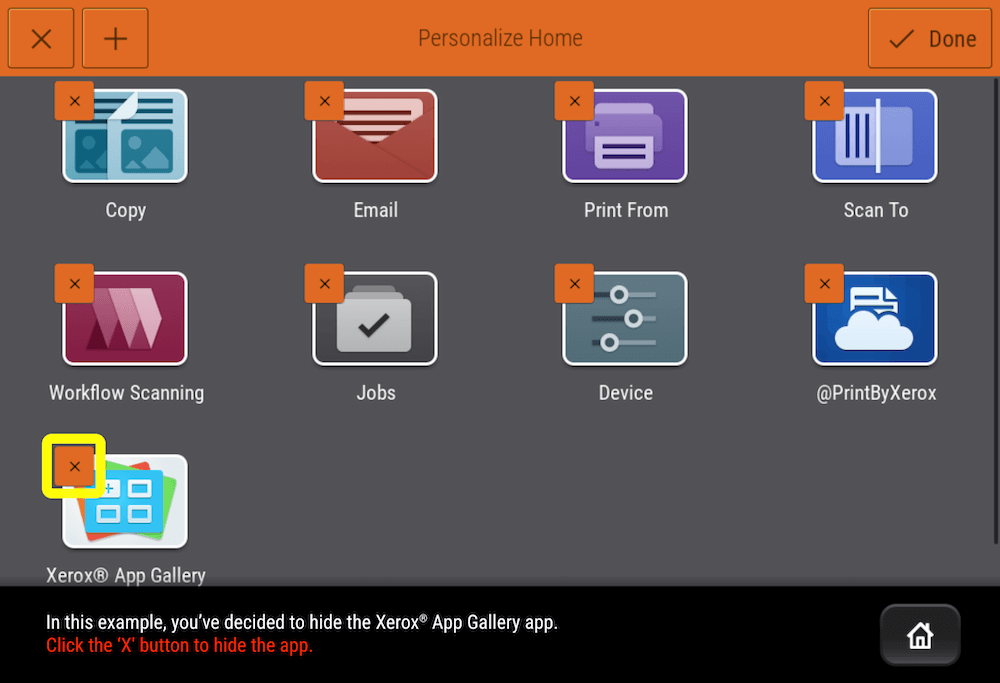
- Touch Hide.
Touch Done.
Verify that only the required apps appear on the Home screen.
Rearranging Apps on the Home Screen:
Touch and hold the required app.
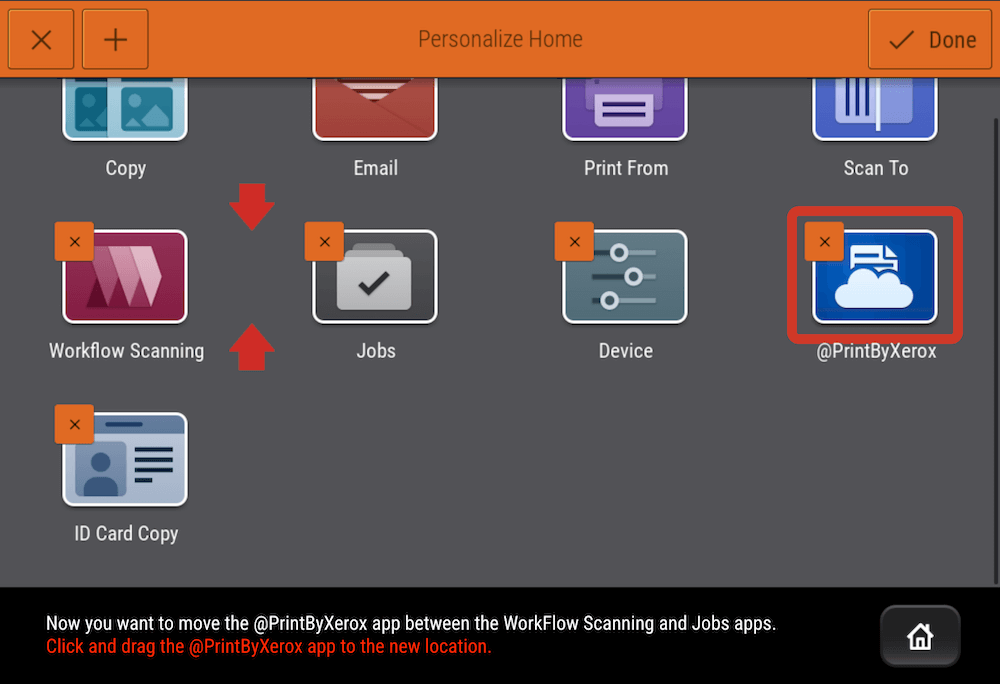
- Drag the app to the new location, then release the app.
- Touch Done.
- Verify that the apps appear in the correct location on the Home screen.
Deleting an App from the Home Screen:
To delete an installed app:
- For the desired app, touch X.
- At the prompt, touch Delete.
- Touch Done.
Verify that only the desired apps appear on the Home screen.
Removing Customization from the Home Screen:
On the home screen, scroll to the bottom and touch Customize.
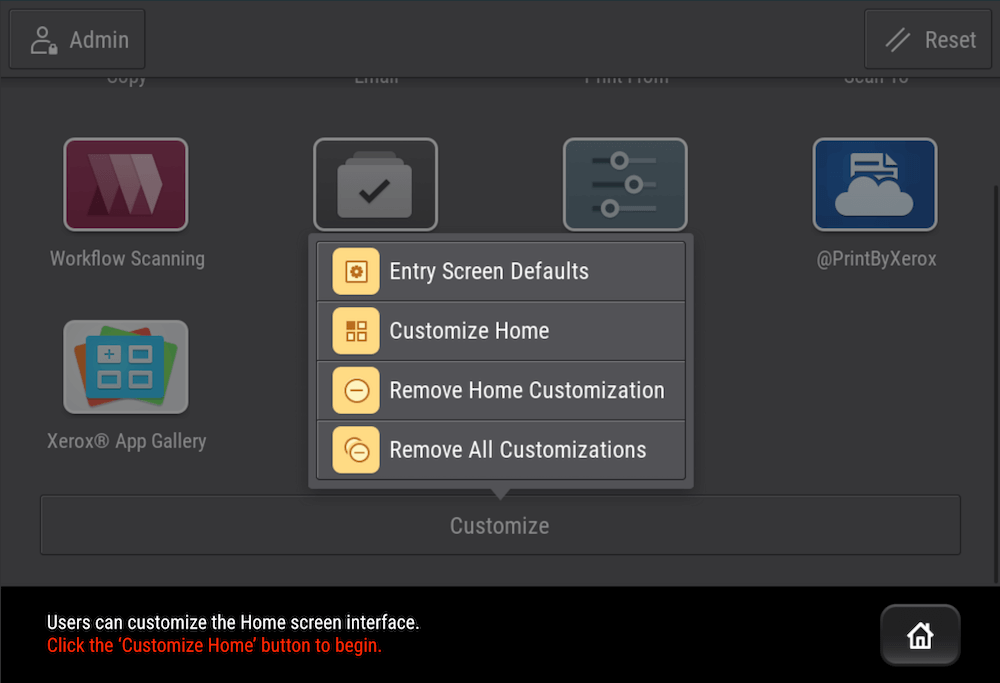
Select an option:
- Remove Home Customization: This option removes all customization from the Home screen.
Note: This option can cause the deletion of 1-Touch, EIP, Single Touch, and Weblet apps.
- Remove All Customizations: This option removes all customizations for the device.
Caution: The Remove Home Customization option removes customization from the Home screen, and other customized device settings.
- At the prompt, touch Remove. Apps appear in their default location on the Home screen.
- Touch Done.
Once you’re done customizing the home screen to your liking, log out of System Administrator mode.
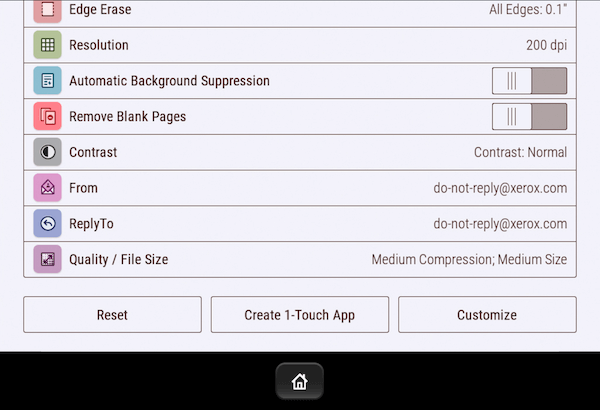
How to Customize Your Apps
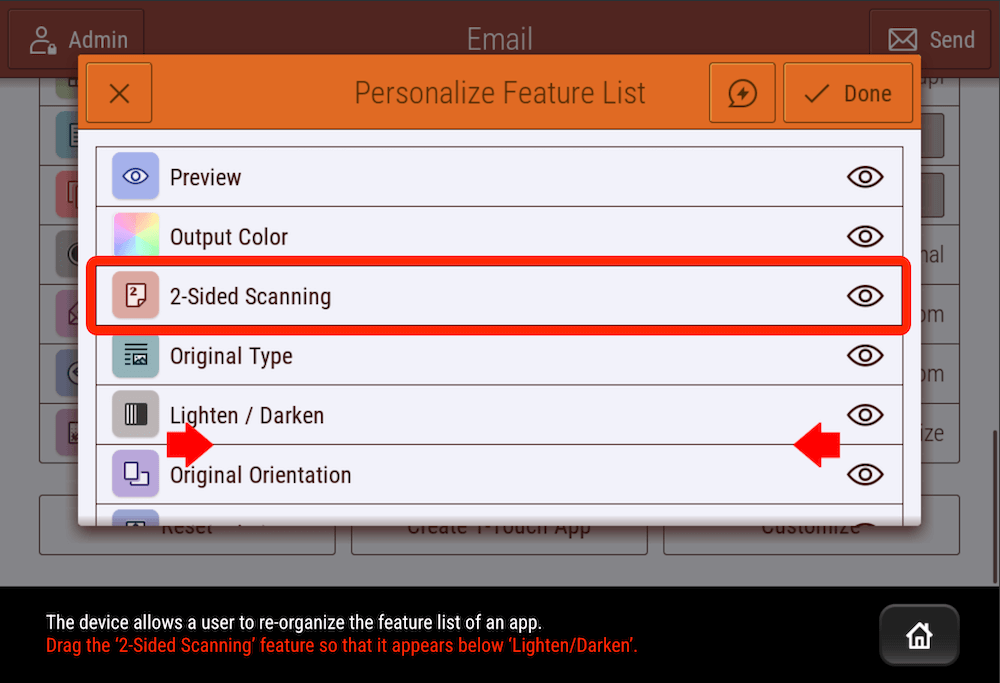
You have the option to customize the list of features within an app's menu. You can choose whether to customize it for yourself or for guest users. You can rearrange the features by dragging the most used ones to the top and the least used ones to the bottom. You can also hide or disable features from the list by clicking on the eye icon.
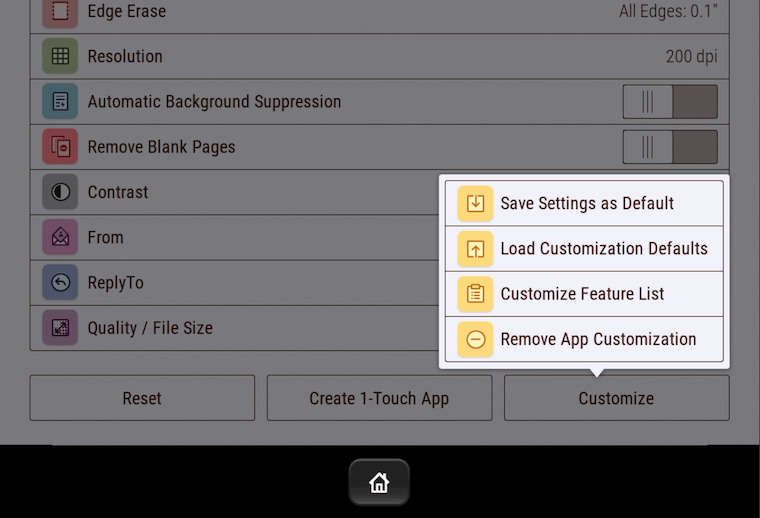
If you wish to undo your customization or make changes to it, you can remove the app customization. Simply click on the Customize button again and a menu will appear. Then, select "Remove app customization" and choose whether you want to remove it for yourself or for guests.
Here are the steps to customize the Feature list for an app:
- At the printer control panel, press the Home button.
- Touch the app required.
- Scroll to the bottom, then touch Customize.
Touch Customize Feature List.
To hide a feature, for the required feature, touch the Eye icon. To signify that the feature is hidden, the Eye icon appears with a line across it.
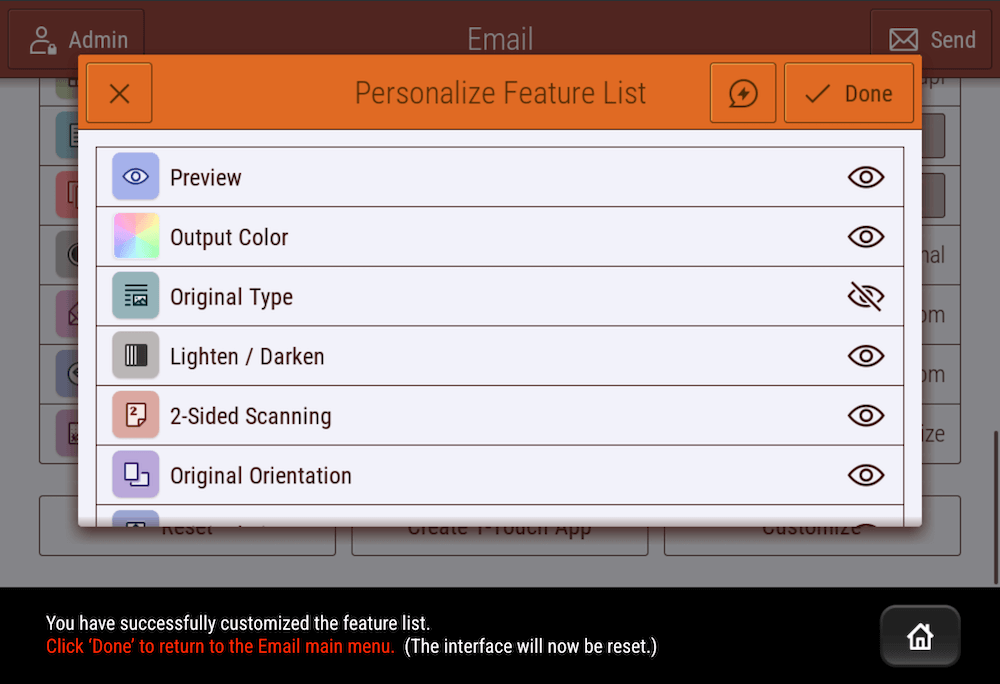
To make a feature visible, simply touch the Eye icon again. The line across the eye will disappear.
- To reorder the menu features, touch and drag the features into the appropriate order.
- To save the current configuration, touch Done.
Customizing App Default Settings:
To customize the default settings for an app:
- Touch the app required.
- Configure the required default settings.
- Touch Save.
- Touch Save Settings as Default. The new settings override the previous default settings.
In case you decide you don’t like your customizations, or you want to start over, you can remove the customizations: Here is how:
Removing App Customization Settings:
- Touch the app required.
- Scroll to the bottom, then touch Customize.
- Touch Remove App Customizations.
- At the prompt, touch Remove.
Just as you did when you customized the home screen, once you’re done customizing your apps, log out of System Administrator mode.
What Else Can You Customize?
Xerox is constantly finding new ways to improve the user experience. Being able to customize your home screen and the features inside of apps isn’t all that’s available. Xerox also lets you create shortcut apps. These are called 1-Touch Apps, which save and simplify lengthy or frequent workflows. Once created, 1-Touch Apps will appear on your home screen. You can also edit and save them as new apps.
To ensure that your productivity and workflow is optimized, Xerox offers a vast selection of apps in their Xerox App Gallery. This gallery is the largest of all printer brands and provides a range of options for industries such as healthcare, education, and business.
If you are interested in trying one of the apps for yourself but don’t want to invest money just yet, consider a free trial. Xerox often provides free trials to many of its apps. It’s a great way to test an app and see how it works before buying it.
If you are interested in a free Xerox app trial, contract us today to learn more.
