Skip to main content
At STPT, we make it our goal to provide quality printing information that is easy to understand, so you know where to go to find answers to your print questions.
We provide quick how-to printing tutorials with video, photo, and written instructions so you can easily solve your printing problems.
We use our printer expertise to help you solve printer tech problems quickly and simply with helpful how-to guides like this one.
Using a how-to guide like this one streamlines the learning process, so you can rely on a knowledgeable print expert to walk you through the toner replacement process in a few easy steps.
Our skilled business consultant, Keith is going to walk you through how to use the Xerox Auto-Redaction App step by step. In this blog, he’ll explain how to find the information needed to be redacted, and customization tools, and present a finished product of the document afterward.
Take the pressure off by trusting our STPT printer specialists to help you through it. With almost 40 years in the business, our team has the expertise to make the replacement process quick and easy for you.
The Auto-Redaction App is very simple and easy to use. It helps eliminate the hassle of having to manually redact private information from documents. This video will give you a step-by-step tutorial on how to install and use the Auto-Redaction App.
Step 1: Open Auto-Redaction App.
You want to install the app from Xerox’s App Gallery, once installed, you’ll find the app on your printer which looks like this.

Step Two: Load paper into the document feeder
After this, you can load your paper. Upon, opening the app you’ll be met with some presets on the application screen. Xerox has its own preset auto-redaction settings. The automated redactions are social security numbers, phone numbers, email addresses, and street addresses of your business.
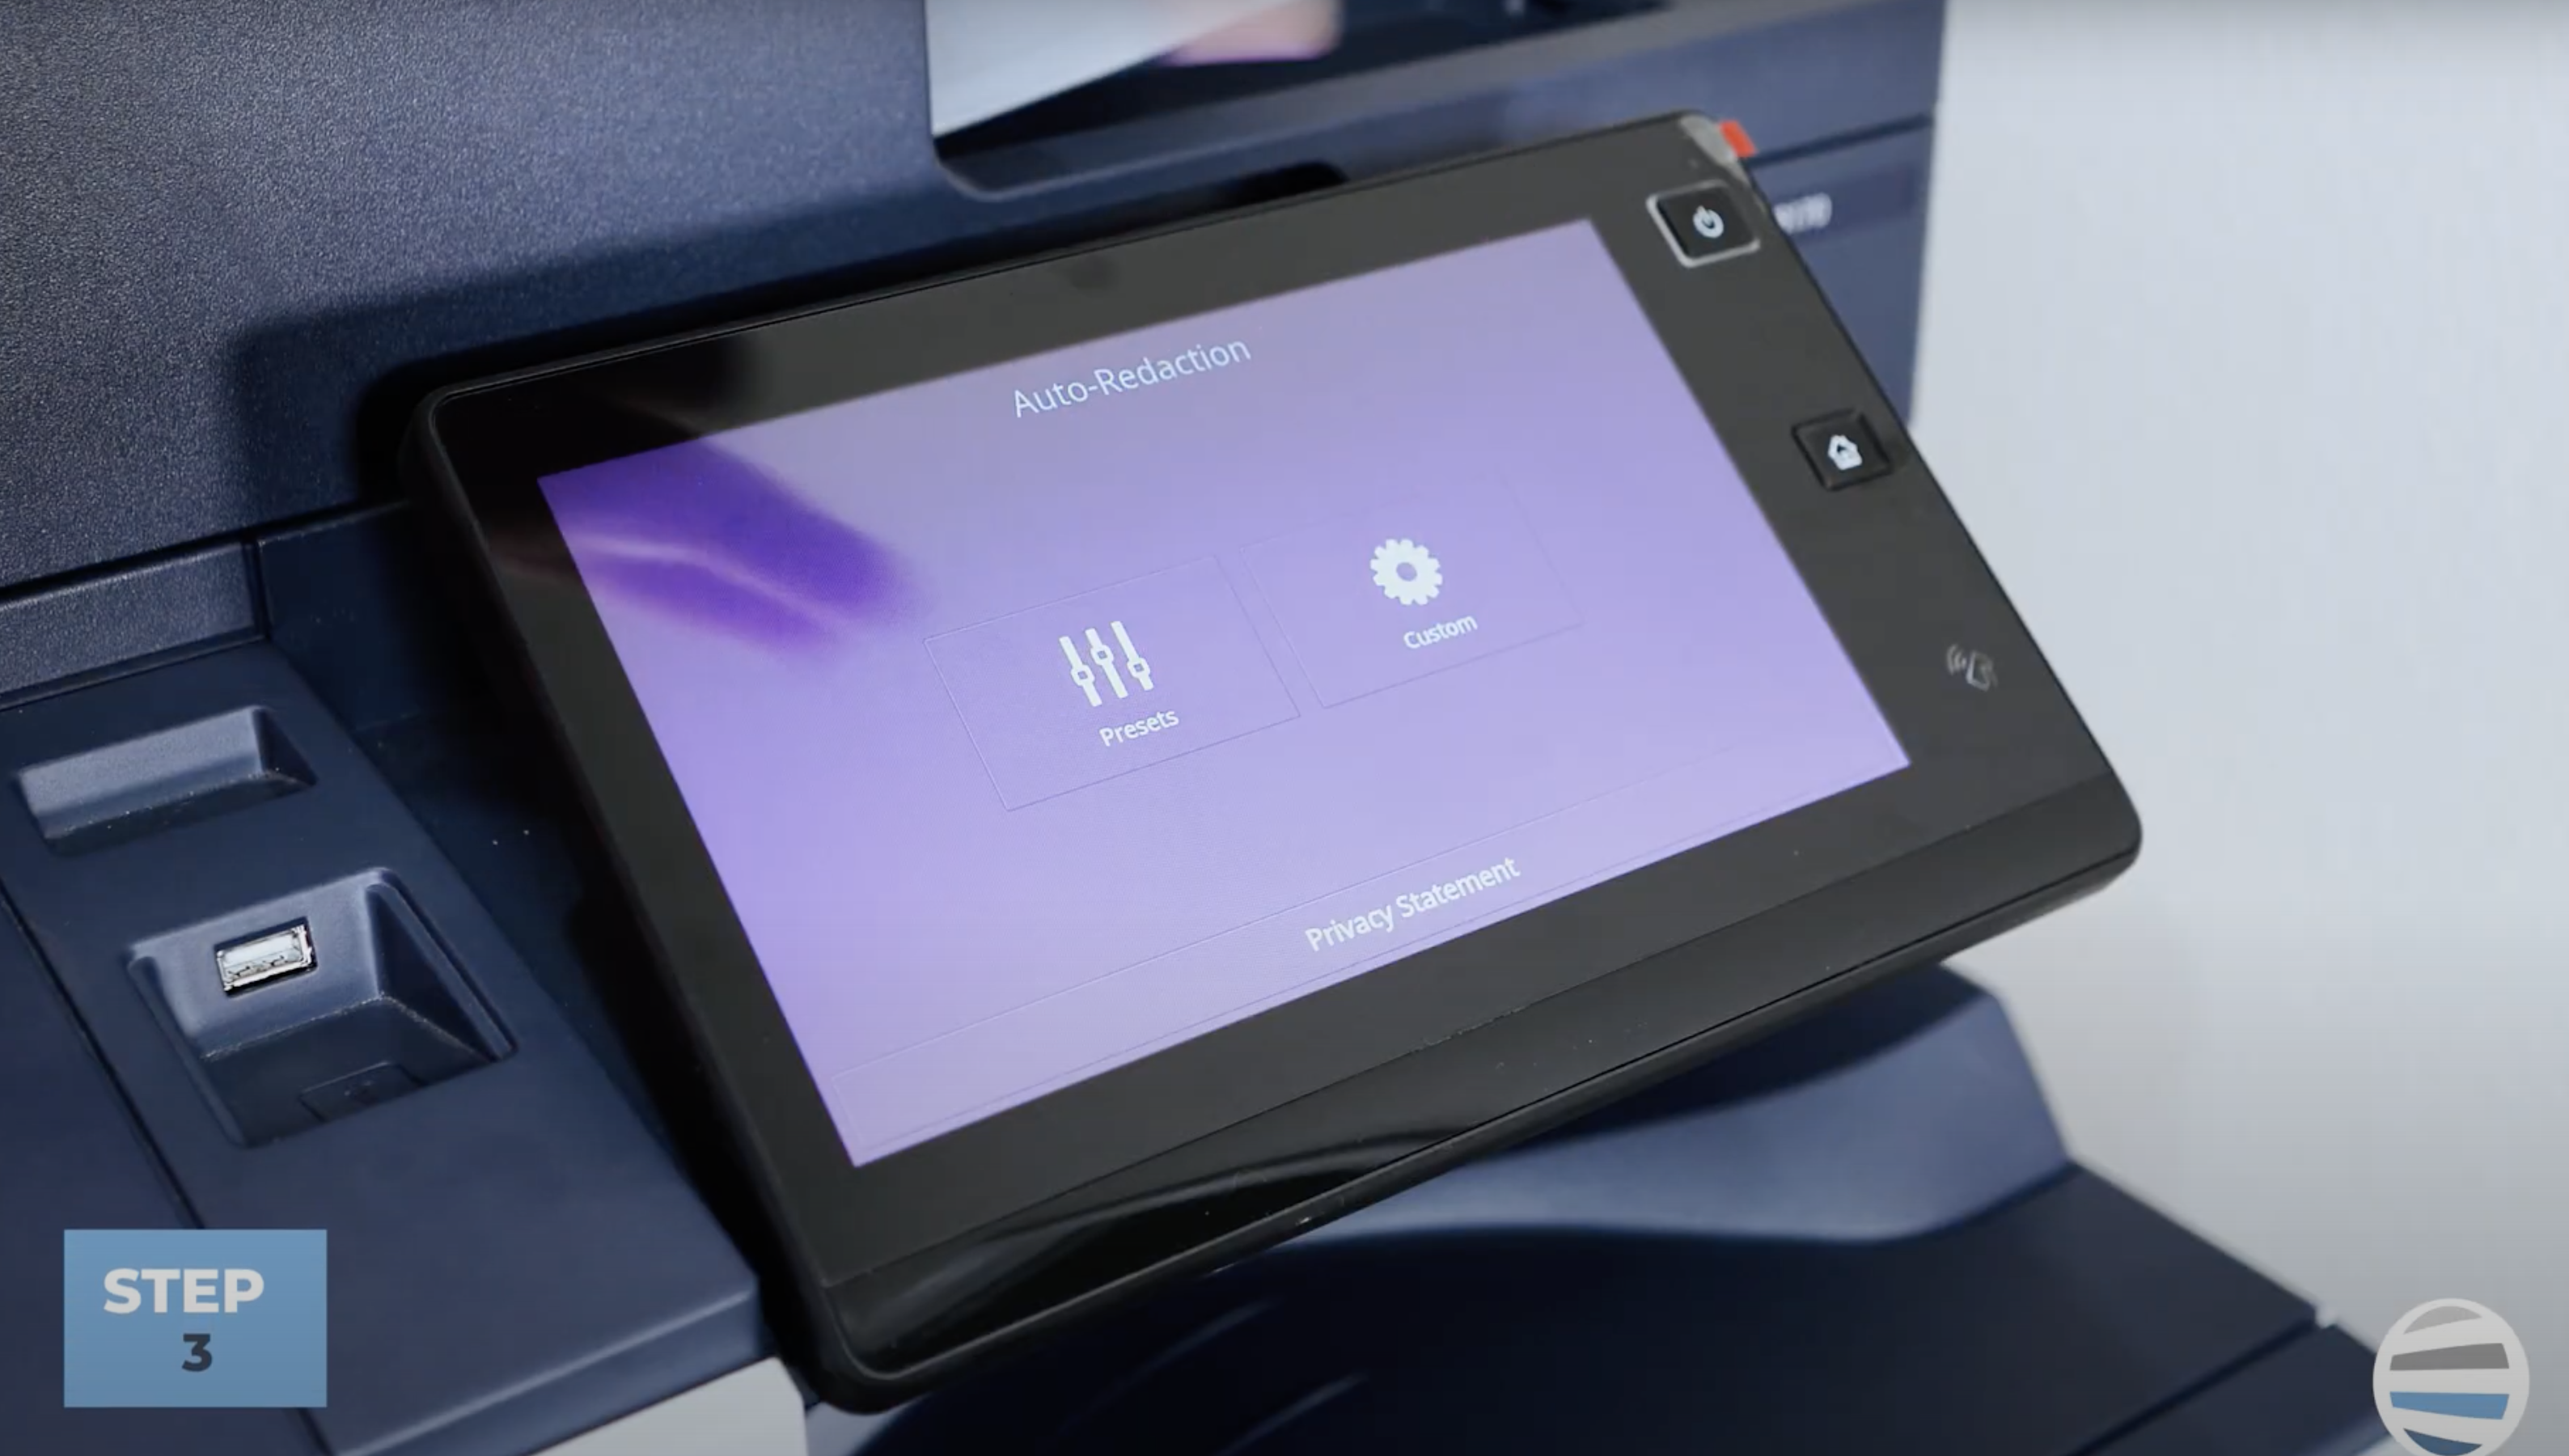
Step Three: Select Custom
If you wish to customize the auto-redaction, you can also do that here too. This allows you to select what secure pieces of information you want to redact from documents.
You can dial in and auto-redact from any of your documents. Here’s a look at the customization options available when wanting to auto-redaction information from documents.
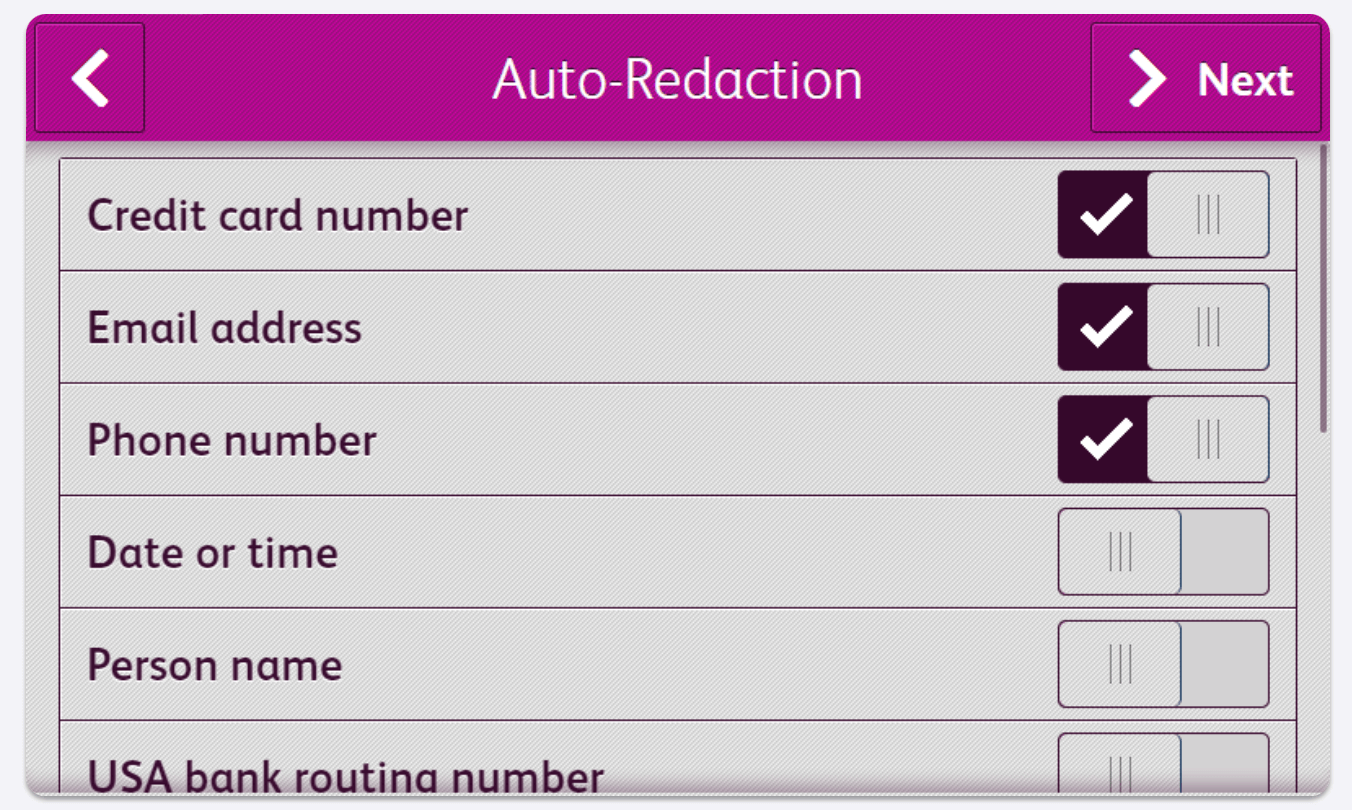
That’s not where the customization ends either. You can also choose to redact the date and time, people's names, banking information, and more. You can also add a custom redaction of a word too. In the video, the example used is printer.
Step 4: Select as many as you need and click next.
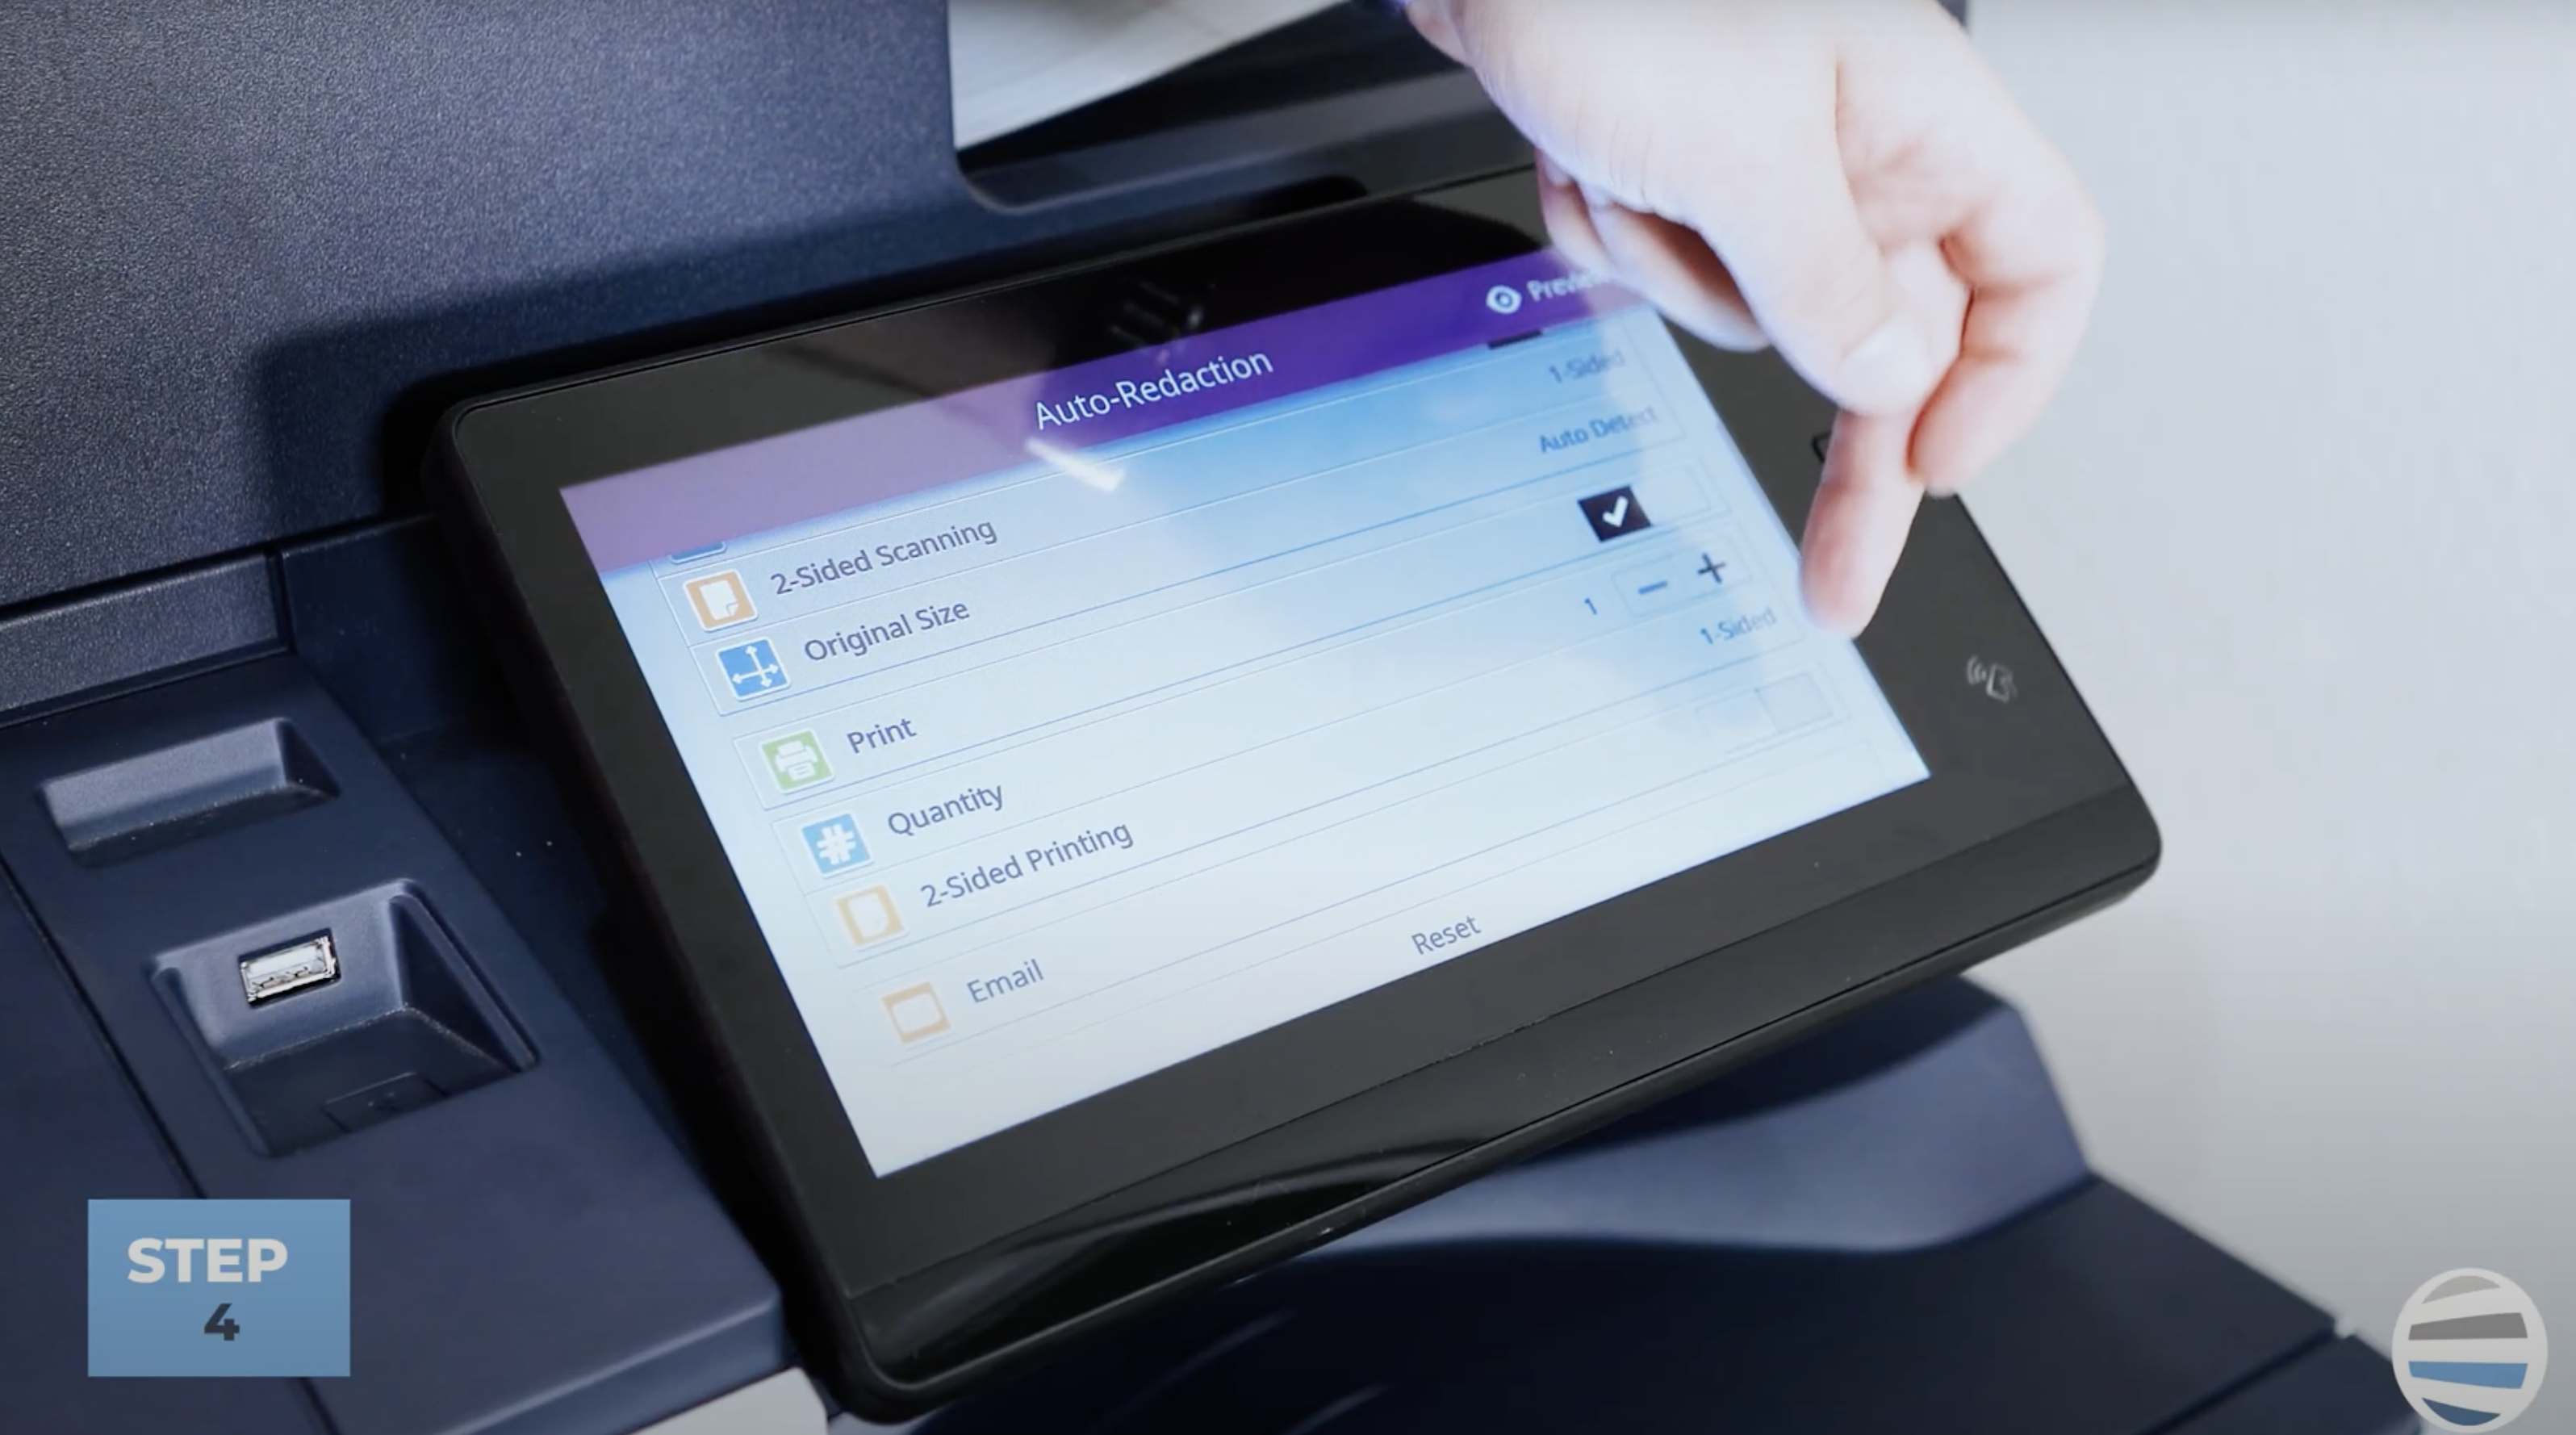
You can also choose if you want two-sided scanning, and the number of prints you’d like, or you can even have it emailed to yourself. Just put in your email address and send it your way. After reviewing everything you need, you can then press preview.
Step 5: Select ‘Preview’
After this point, the document goes through the scanner will read your documents and begin auto-redacting any of your settings. While this is happening, you can also see this in real-time before you print.
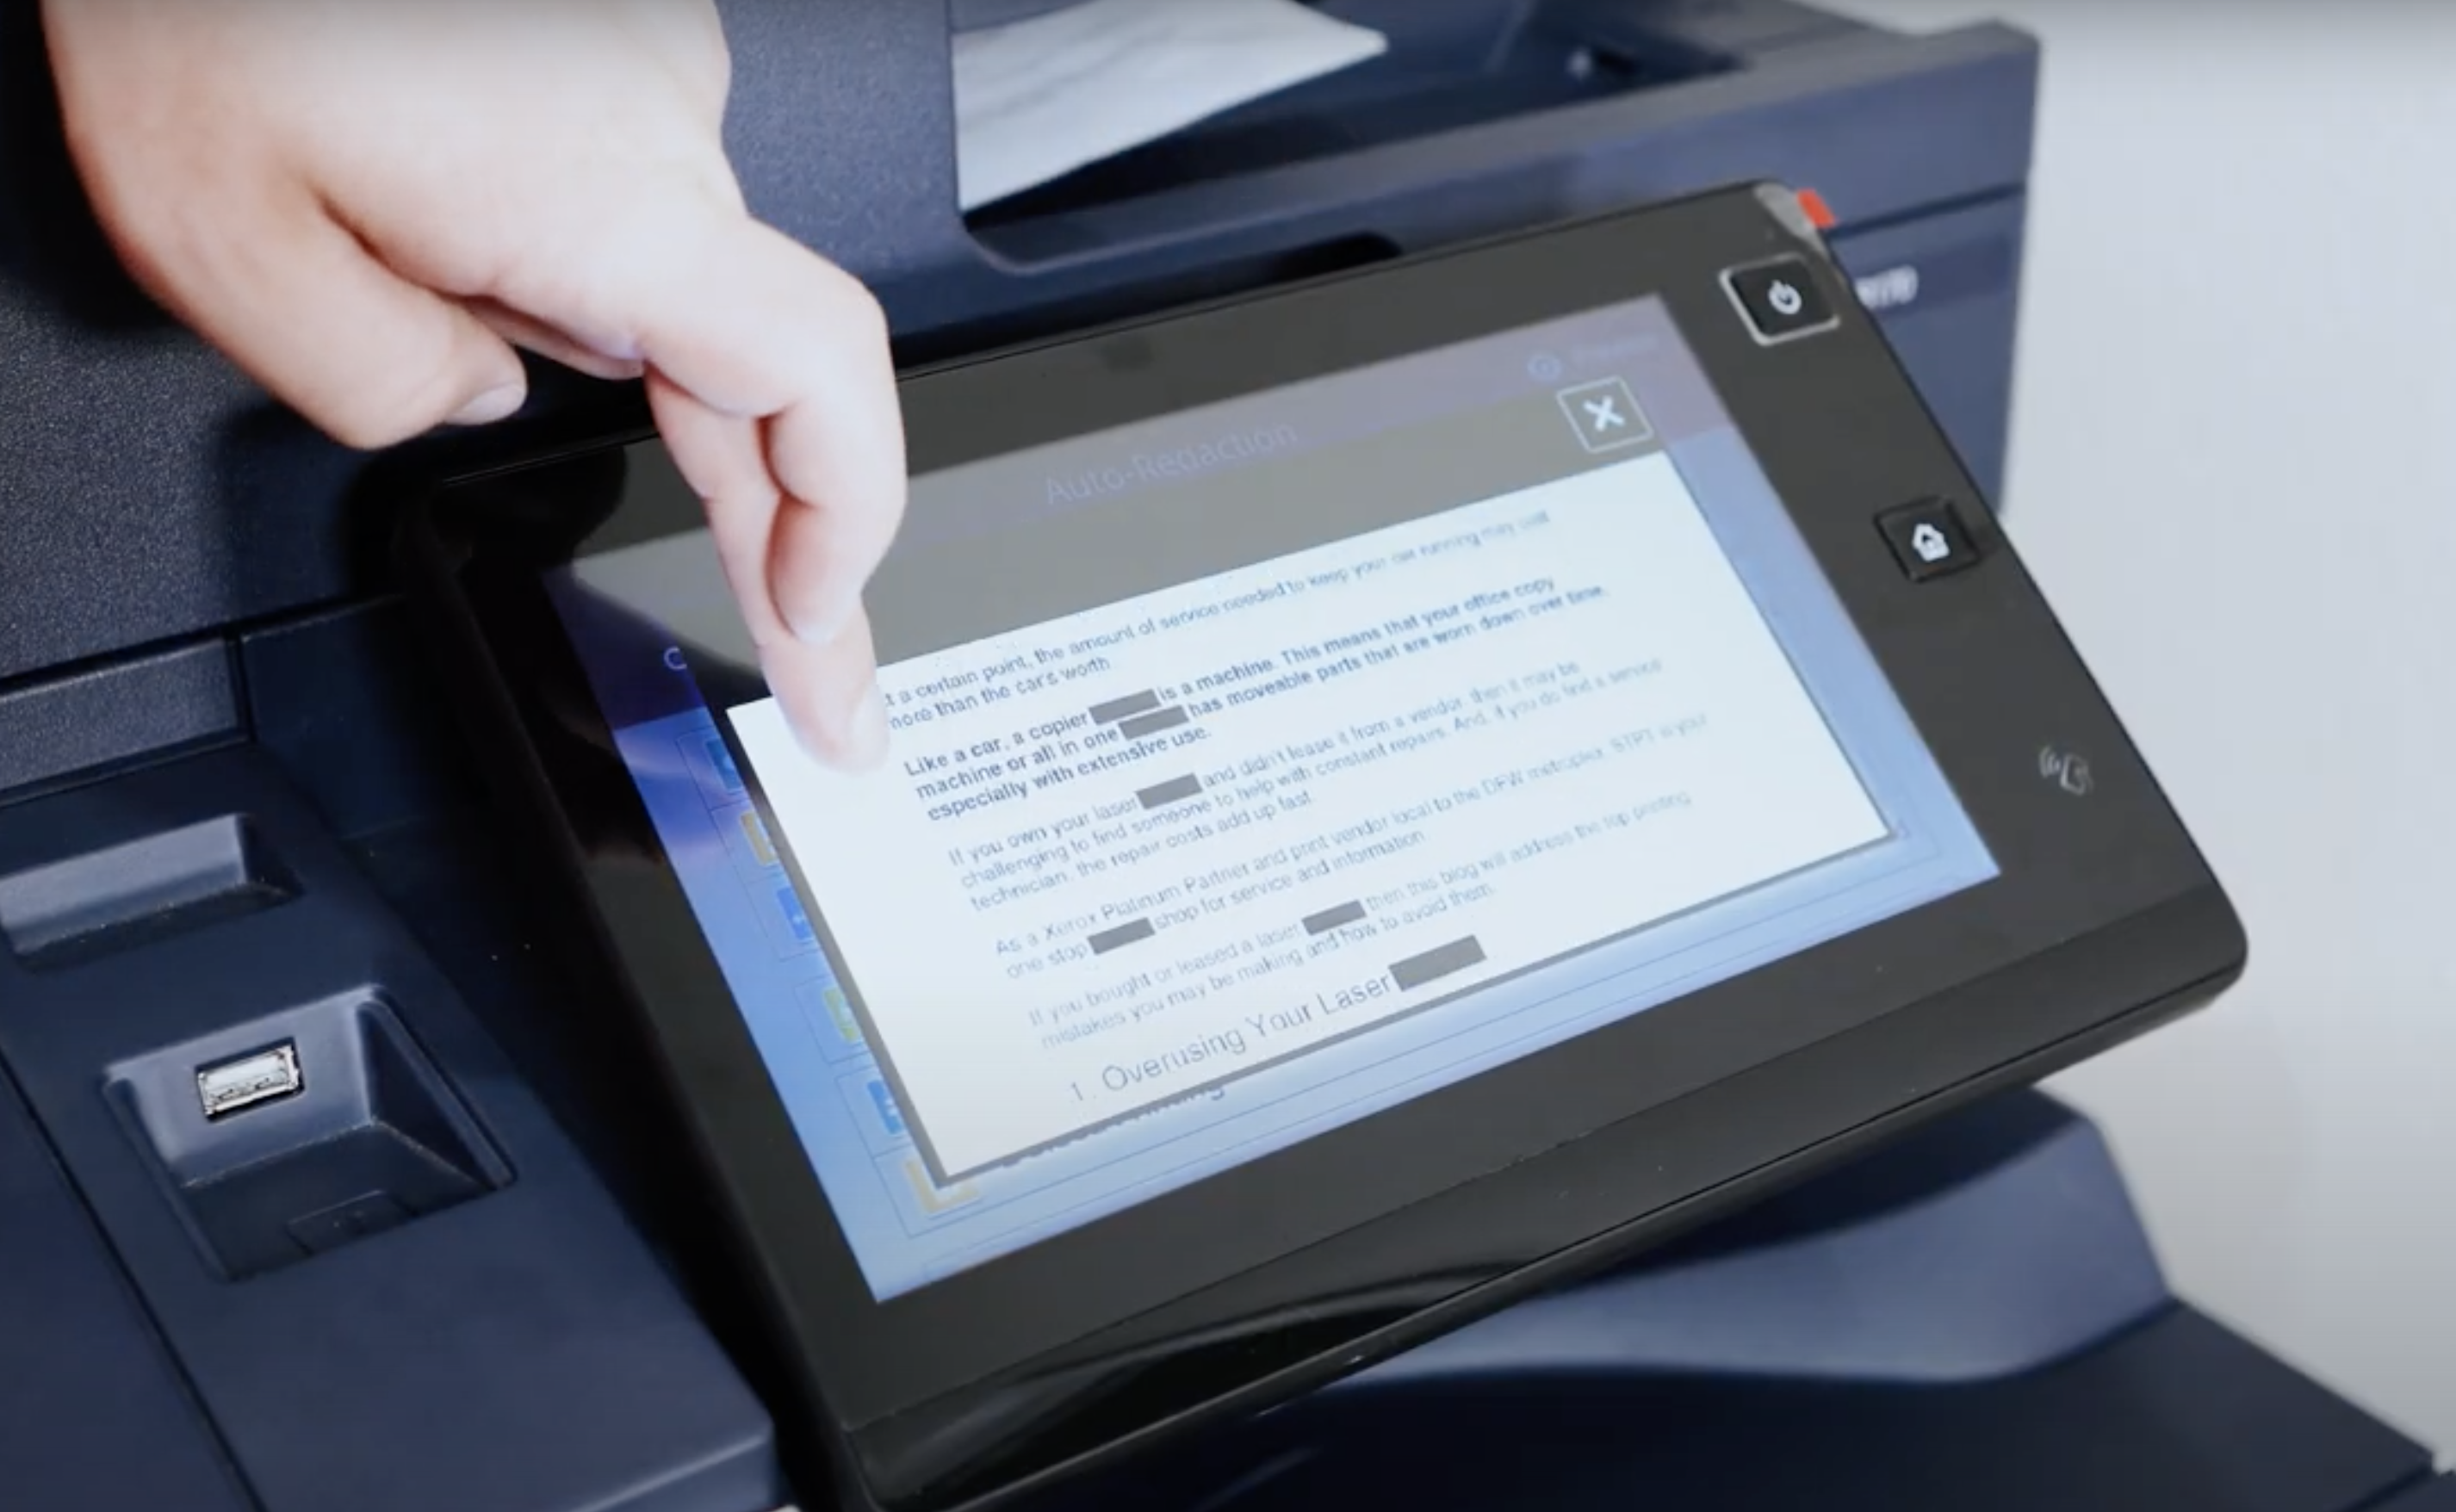
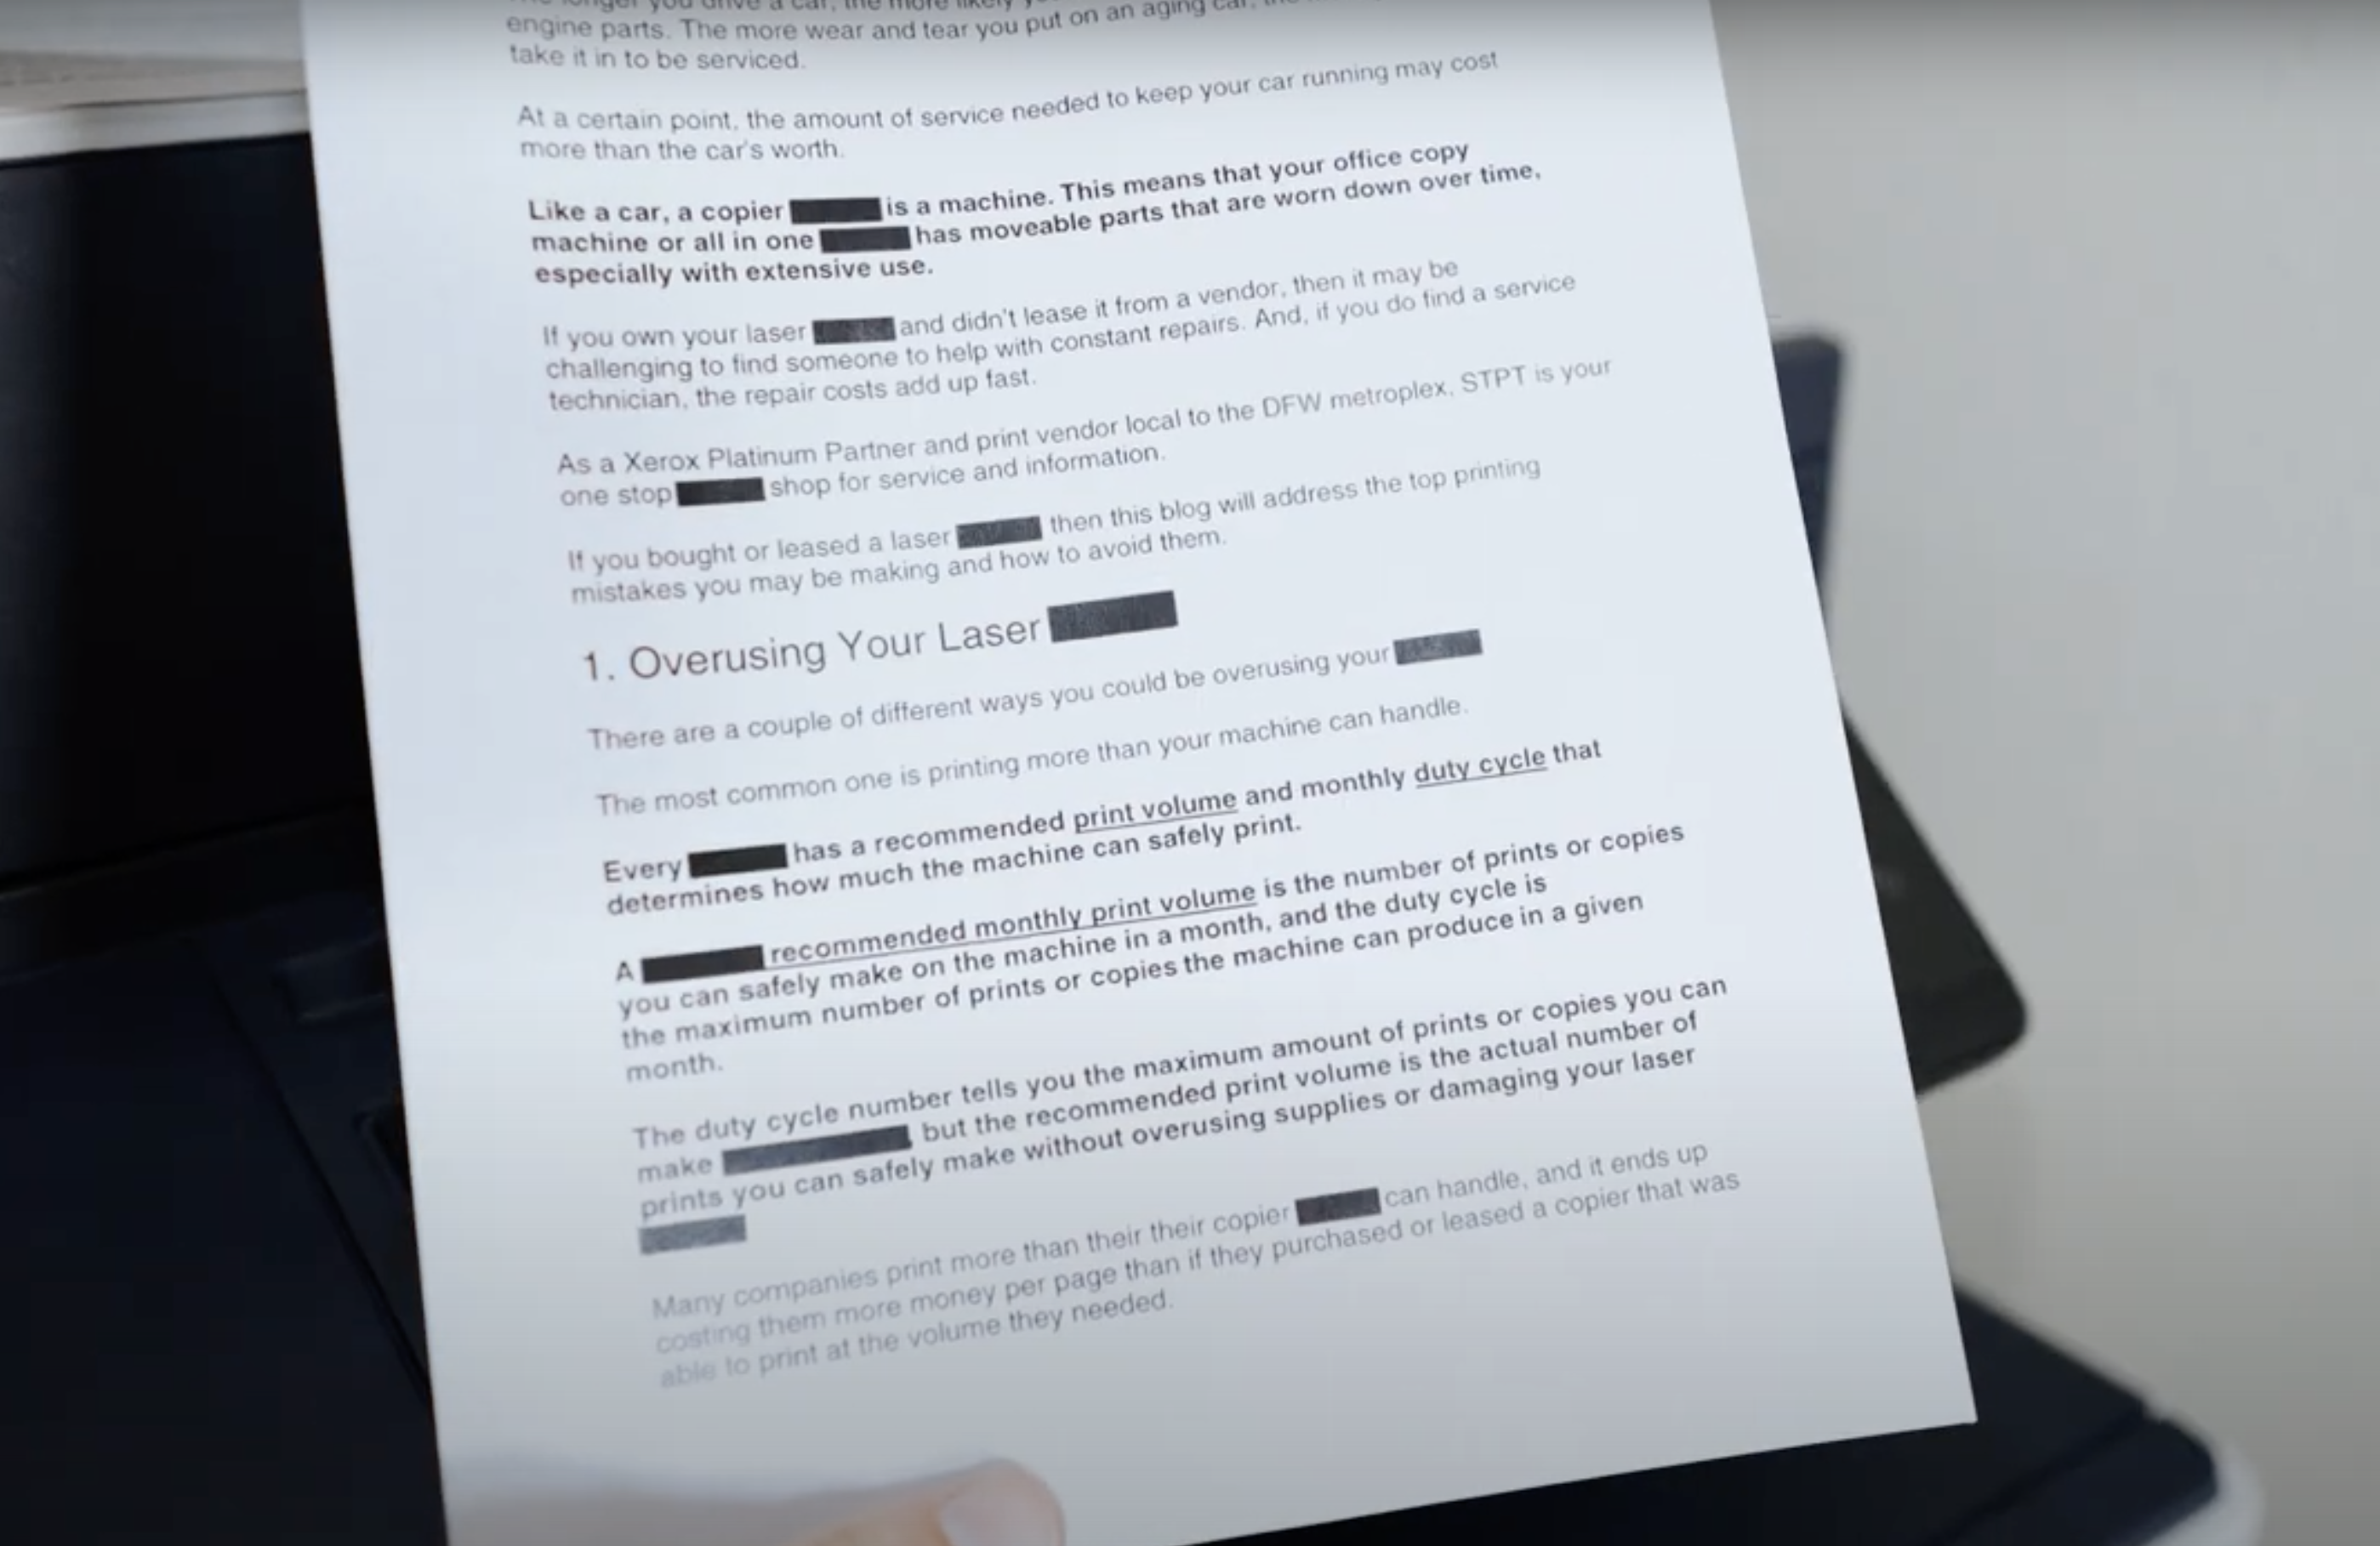
Step 6: Select Accept to print the document
Once the document is printed, you’re all good to go. Here is an example when it’s done.
Pricing Point for Auto-Redaction App
There are different pricing points based on the pages that need to be scanned for redaction. All subscriptions to the service are annual.
- For 2,000 pages scanned, the subscription price is around $70.
- For 7500 pages scanned, the subscription price is around $200.
- For 25,000 pages scanned, the subscription price is around $500.
Need Another Quick Printer Fix?
If you want to make your printer’s maintenance quicker and easier, check out our YouTube channel.
The Printing Workshop gives you free access to all our YouTube video tutorials. Let our service technicians and print experts walk you through simple tech solutions for your Xerox printer.